
 Pin it
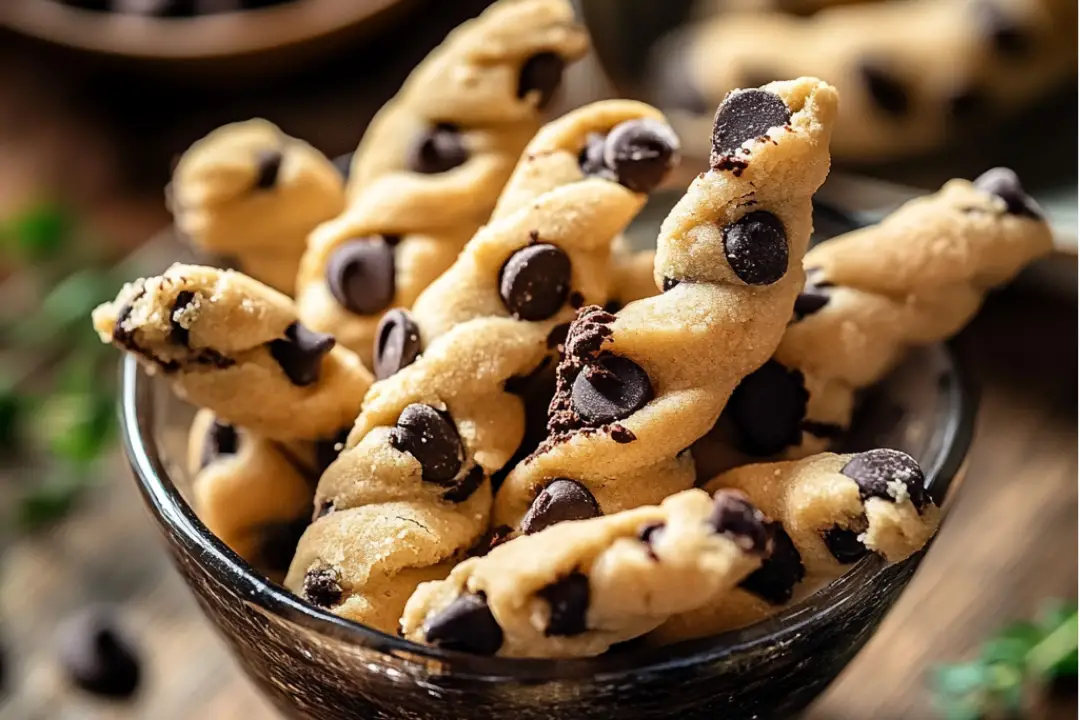
This fun twist on classic chocolate chip cookies transforms the beloved dough into delightful twists that deliver the perfect blend of chewiness and rich chocolate in every bite. The shape makes them perfect for dipping in milk or simply enjoying on their own when you need a special treat that's different from ordinary cookies.
I first created these twists when my niece came over wanting to bake something special but different from our usual cookie routine. The moment she twisted that first piece of dough, her eyes lit up with such excitement that these have become our special baking tradition whenever she visits.
- All purpose flour: Forms the foundation of our twists ensuring the perfect structure
- Unsalted butter: Softened to room temperature creates that melt in your mouth texture
- Brown sugar: Packed provides a deep caramel undertone and keeps the twists moist
- Granulated sugar: Balances the sweetness and helps create those slightly crisp edges
- Milk: Adds moisture and helps create the perfect dough consistency
- Vanilla extract: Enhances all the flavors look for pure vanilla for best results
- Baking soda: Provides just the right amount of rise without making them too cakey
- Salt: Balances the sweetness always use fine sea salt for baking
- Chocolate chips: Choose semisweet for the perfect balance or dark chocolate for less sweetness
Step-by-Step Instructions
- Prepare the oven:
- Preheat your oven to 350°F and line a baking sheet with parchment paper. This temperature creates the perfect environment for the twists to develop golden edges while maintaining a soft center.
- Create the butter base:
- In a large bowl, cream together the softened butter with both brown and granulated sugars until the mixture becomes notably lighter in color and fluffy in texture. This should take about 3 minutes with an electric mixer or 5 minutes by hand. This step incorporates air which helps create that perfect texture.
- Add wet ingredients:
- Pour in the milk and vanilla extract, mixing until the mixture looks smooth and well combined. The milk might make the mixture look slightly curdled at first, but continue mixing and it will come together beautifully.
- Prepare dry ingredients:
- In a separate bowl, thoroughly whisk together the flour, baking soda, and salt. This ensures even distribution of the leavening agent and prevents any salty pockets in your finished twists.
- Combine wet and dry mixtures:
- Gradually add the dry ingredients to your butter mixture, mixing at low speed just until no flour streaks remain. Overmixing can develop gluten and make your twists tough, so stop once everything is incorporated.
- Add chocolate chips:
- Gently fold in the chocolate chips using a spatula until evenly distributed throughout the dough. For extra chocolate goodness, reserve a few chips to press into the tops of the twists before baking.
- Shape the twists:
- Take about 2 tablespoons of dough and roll it between your palms to create a rope about 6 inches long. Fold it in half and twist the two strands together, pinching the ends to secure. Place on the prepared baking sheet leaving about 2 inches between each twist.
- Bake to perfection:
- Bake in the preheated oven for 10 to 12 minutes, or until the edges become lightly golden while the centers still look slightly underdone. They will continue cooking from residual heat after removal.
- Cool before serving:
- Allow the twists to rest on the baking sheet for 5 minutes before transferring to a wire rack to cool completely. This resting period allows them to set up properly and develop their perfect chewy texture.
Brown sugar is my favorite ingredient in this recipe. Its molasses content not only adds that wonderful caramel note but helps keep the twists moist for days. The first time I made these for my family gathering, my brother who typically avoids sweets had three in one sitting and declared them better than any bakery cookie he'd ever tried.
Make Ahead and Storage
These chocolate chip cookie dough twists stay remarkably fresh when stored properly. Place them in an airtight container with a slice of bread to maintain moisture. They'll keep at room temperature for up to 5 days, though they rarely last that long in my household. The dough itself can be refrigerated for up to 3 days before baking, just let it come to room temperature for about 15 minutes before shaping. You can also freeze the shaped unbaked twists for up to 3 months, then bake directly from frozen, just adding 2 minutes to the baking time.
Perfect Pairings
These twists make a delightful accompaniment to both hot and cold beverages. They're substantial enough to dunk in coffee without falling apart, and the chocolate chips create beautiful melty pockets when paired with hot cocoa. For an indulgent dessert, sandwich some vanilla ice cream between two twists and freeze for 30 minutes for homemade cookie ice cream sandwiches. During the holidays, I often serve them alongside a dessert charcuterie board with fruits, nuts, and different dipping sauces like caramel or raspberry coulis.
Troubleshooting Tips
If your twists spread too much during baking, your butter might have been too warm. Refrigerate the shaped twists for 15 minutes before baking next time. For twists that seem too dry, you likely added too much flour. Remember to measure flour by spooning it into measuring cups rather than scooping directly from the container. If your twists aren't holding their shape, try making thicker ropes before twisting. The dough should be soft but not sticky. If it's too sticky to work with, add a tablespoon of flour at a time until it reaches the right consistency.
Frequently Asked Questions
- → Can I use other types of chocolate for this?
Yes, you can substitute regular chocolate chips with dark, white, or mini chocolate chips to suit your preference.
- → How do I ensure the dough twists hold their shapes?
Make sure the dough is chilled slightly before shaping into twists. This will help them retain their form while baking.
- → What can I do to make the twists extra chewy?
Underbake the twists slightly, removing them from the oven when the edges are just lightly golden.
- → Are there any alternatives to butter for this recipe?
You can use plant-based butter for a dairy-free option or margarine, though the flavor may vary slightly.
- → Can I add toppings or decorations?
Absolutely! You can sprinkle over some coarse sugar, drizzle with melted chocolate, or add festive sprinkles before baking.
- → How long can these twists be stored?
Store the twists in an airtight container at room temperature for up to 4 days, or freeze for longer storage.