
 Pin it
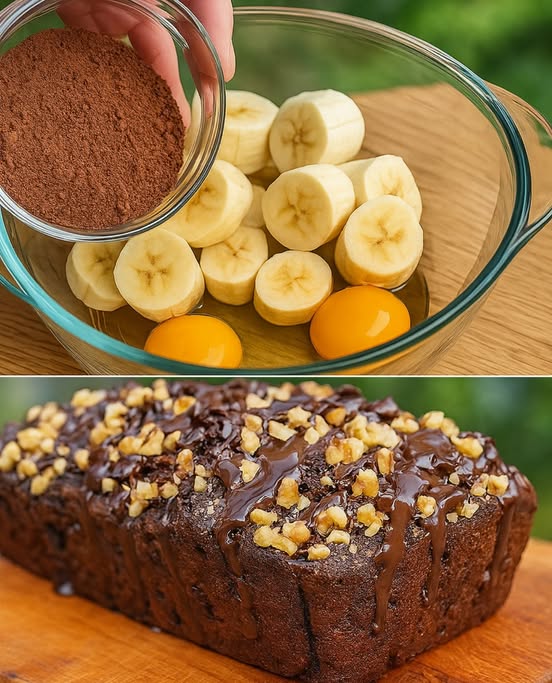
This chocolate banana bread transforms your overripe bananas into a decadent treat that walks the line between breakfast and dessert. The deep cocoa flavor paired with sweet banana creates that perfect balance that keeps you coming back for just one more slice.
I first created this recipe when my daughter refused to eat her bananas for three days straight. What started as kitchen salvage operation has become our most requested weekend baking project, with my kids often letting bananas ripen on purpose just so we can make this bread.
Ingredients
- Ripe bananas: Choose the spottiest ones with dark skin for maximum sweetness and easy mashing
- Unsalted butter: The fat content creates richness and helps prevent dryness
- Granulated sugar: Balances the bitterness of cocoa while enhancing the banana flavor
- Large eggs: Provide structure and help bind all ingredients together
- Vanilla extract: Adds depth and complexity to the chocolate notes
- All purpose flour: Creates the perfect tender crumb that still holds together when sliced
- Unsweetened cocoa powder: Use Dutch processed for the richest chocolate flavor
- Baking soda: Reacts with the acidity in bananas and cocoa for proper rise
- Salt: Enhances all flavors and balances sweetness
- Chocolate chips: Use semisweet for the perfect balance with the sweet bread
Step-by-Step Instructions
- Preheat and Prepare:
- Heat your oven to 350°F while you grease your loaf pan. The parchment paper liner is crucial here as it prevents sticking and makes removal from the pan effortless. Make sure the parchment hangs over the long sides of the pan to create handles for easy lifting once baked.
- Mix the Wet Ingredients:
- Mash those spotty bananas until mostly smooth but still with some small chunks for texture. The melted butter should be warm but not hot when added to prevent cooking the eggs. Beat everything thoroughly until the mixture looks smooth and slightly fluffy, which could take about 2 minutes of vigorous stirring.
- Combine Dry Ingredients:
- Whisking the dry ingredients separately ensures even distribution of leavening agents and cocoa powder. Sift the cocoa powder if you notice any lumps to prevent bitter pockets in your final bread. This step takes just a minute but makes a huge difference in texture.
- Make the Batter:
- When combining wet and dry ingredients, use a gentle folding motion rather than aggressive mixing. Overmixing develops gluten which creates a tough bread. Stop stirring as soon as the last streak of flour disappears. The chocolate chips should be tossed in right at the end with just a few strokes.
- Bake:
- Pour the thick batter into your prepared pan, taking care to spread it evenly into the corners. Those extra chocolate chips on top will create a beautiful crust that signals to everyone this is no ordinary banana bread. The bread is done when the top feels firm and springs back slightly when touched.
- Cool and Serve:
- Patience during cooling prevents the bread from breaking apart during slicing. The ten minutes in the pan allows the structure to set before moving to the cooling rack where air can circulate around all sides. For the cleanest slices, wait until completely cool or even chill slightly.
The cocoa powder is truly the star ingredient in this recipe. I once tried making it with regular grocery store cocoa and then again with premium Dutch processed, and the difference was remarkable. The higher quality cocoa created a deep, almost truffle like flavor that elevated this from a simple quick bread to something that could be served in a bakery.
Perfect Ripeness Matters
The success of this recipe depends heavily on using properly ripened bananas. The ideal bananas should have dark speckles covering most of the peel and feel soft when gently pressed. These overripe bananas contain more sugar and a stronger banana flavor that stands up to the rich chocolate. If your bananas aren't quite ready, you can speed up the process by placing them in a paper bag with an apple overnight. The ethylene gas released will accelerate ripening. Conversely, if you have perfectly ripened bananas but aren't ready to bake, peel them and freeze them for later use.
Creative Variations
This versatile chocolate banana bread recipe serves as an excellent base for customization. For a tropical twist, add half a cup of toasted coconut flakes to the batter. Nut lovers might appreciate a half cup of chopped walnuts or pecans folded in with the chocolate chips. For an indulgent dessert version, add a swirl of peanut butter through the batter before baking or drizzle the cooled bread with a simple glaze made from powdered sugar and milk. You can even transform this into muffins by dividing the batter among a 12 cup muffin tin and reducing the baking time to about 22 minutes.
Serving Suggestions
While delicious on its own, this chocolate banana bread reaches new heights with thoughtful accompaniments. Try warming a slice slightly and topping it with a scoop of vanilla ice cream for a decadent dessert. For breakfast, toast a slice and spread with a thin layer of peanut butter or cream cheese. The bread also pairs beautifully with a cup of coffee or glass of cold milk. For a special brunch presentation, cut thick slices and use them as the base for a decadent french toast, dipping in an egg mixture and frying until golden.
This recipe truly elevates banana bread to bakery quality with its rich chocolate flavor. It's a favorite at my house for both breakfast and dessert!
Frequently Asked Questions
- → How ripe should the bananas be?
The riper, the better! Overripe bananas with brown spots are ideal for natural sweetness and flavor.
- → Can I substitute butter with oil?
Yes, you can use an equal amount of vegetable oil or melted coconut oil if you prefer.
- → How can I enhance the chocolate flavor?
Adding a teaspoon of espresso powder can deepen the chocolate flavor without making the bread taste like coffee.
- → Can I add nuts or other mix-ins?
Absolutely! Chopped walnuts, pecans, or even shredded coconut can add texture and flavor.
- → How should I store the banana bread?
Store it in an airtight container at room temperature for 2 days, refrigerate for up to 5 days, or freeze for up to 3 months.
- → What size loaf pan should I use?
A standard 9x5-inch loaf pan is perfect for this recipe. Grease and line it with parchment paper for easy removal.