
 Pin it
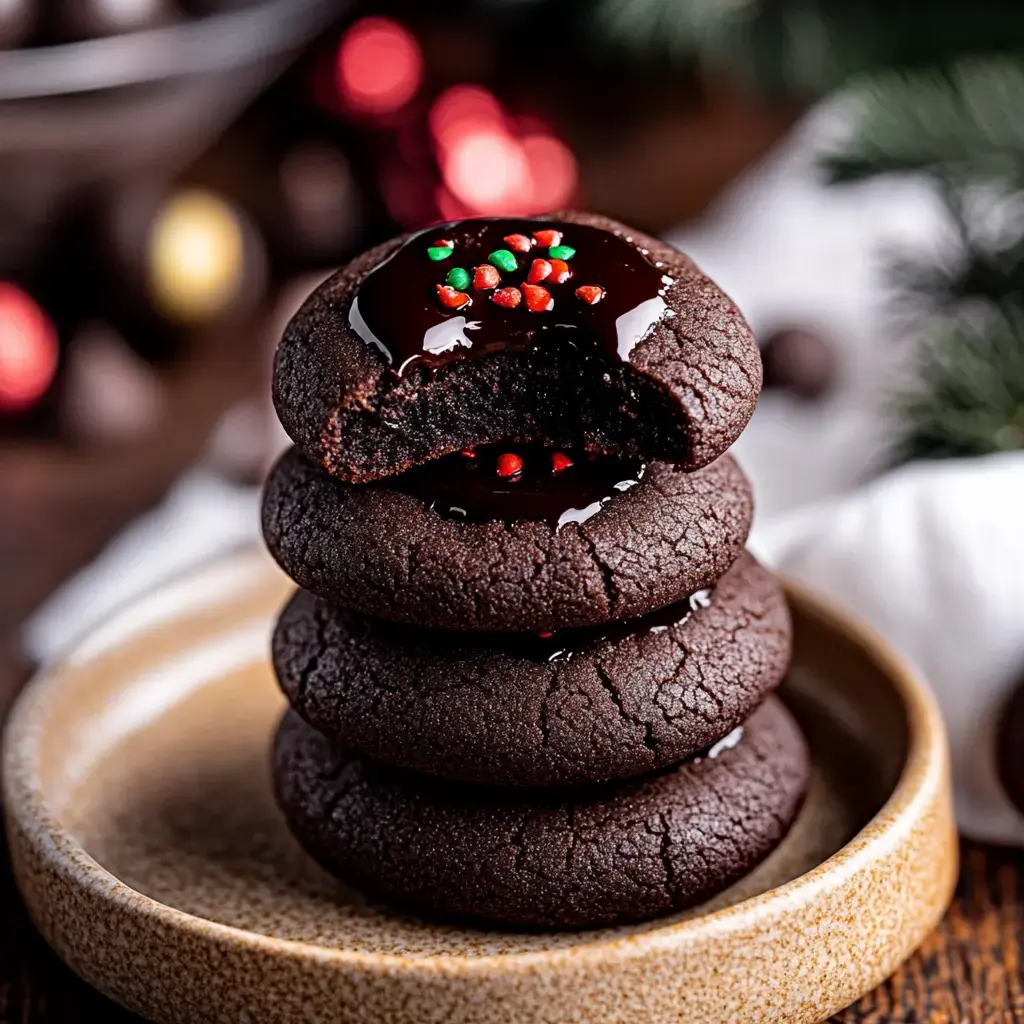
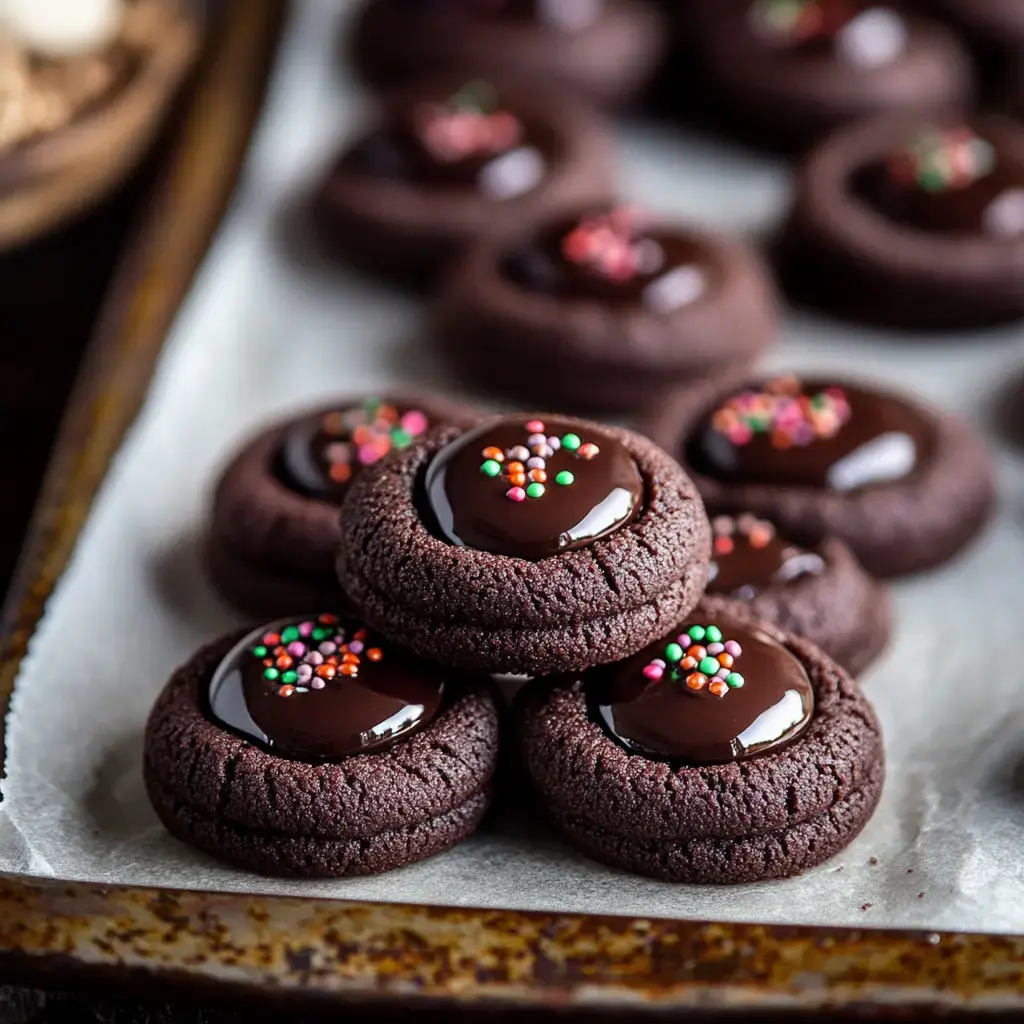
I started whipping up these dual cocoa indent cookies after stumbling on this killer cocoa powder during a discount. My initial try was quite chaotic - got chocolate all over, somehow even in my hair, but that deep cocoa aroma had everyone hanging around the cooking space. They're now our top pick for family baking time. The kids get super excited pressing their thumbs to make dents, though sometimes you'll find extra indentations because they just can't contain their enthusiasm!
What Makes These Cookies So Awesome
- Deep cocoa taste from top to bottom
- A blast to create with little ones who can't wait to help
- They seem impressive but they're actually straightforward
- Fill your home with divine chocolate scents
- Hit the spot for any chocolate fan you know
- Knockout choice for cookie exchanges or presents
- They keep that gooey softness for days - if they don't vanish first!
Your Shopping List
- For The Cookies:
- Basic flour you already have
- Premium dark cocoa powder don't go cheap here
- Unsalted butter left out to soften
- Both white and brown sugars for the best flavor
- A few egg yolks at room temperature works best
- Quality chocolate for centers it'll melt smoother
- Thick cream for super velvety filling
- Kitchen Stuff:
- Cups and spoons for measuring
- Large bowl for mixing
- Baking trays
- Small saucepan to melt chocolate
Baking Time Begins
- First Steps
- Let your butter soften naturally on the counter - I once tried to rush it in the microwave and ended up with chocolate liquid instead of proper cookies. While waiting, combine your flour and cocoa. I used a whisk this time and avoided the usual cocoa dust storm in my kitchen!
- Creating The Base
- Cream your butter with both sugars until it's airy and pale - about 5 minutes by machine or an arm workout by hand. Add egg yolks one after another. Gradually mix in your dry ingredients unless you want to look like you work making chocolate bars.
- Getting Hands Dirty
- Form small balls from your dough - roughly golf ball sized works perfectly. The kids always want to help with this part though the dough mysteriously shrinks during the process. Make gentle indents in the middle - tiny thumbs create the cutest results!
- Into The Oven
- Bake for 10-12 minutes. Your home will start smelling incredible right about now. Don't leave them in too long or they'll dry out - slightly undercooked beats overcooked any day.
- Crafting The Center
- As cookies cool, prepare your chocolate filling. Warm cream until tiny bubbles form then pour it over your chocolate. Let it sit briefly before stirring until glossy and smooth. If it looks lumpy just keep mixing, I promise it'll work out.
- Putting It All Together
- Spoon chocolate mix into each indent. Try to save some cookies while waiting for the chocolate to firm up. Adding sprinkles on top makes them extra special if you can find them before the kids use them all for their own creative purposes.
 Pin it
Tricks I've Learned
I've picked up some handy moves after making these lots of times. Eggs at room temp mix in way better than cold ones from the fridge. Don't skip cooling the dough if you want shapely cookies or they'll spread all across your tray. If the indents puff up while baking just push them down again when they're still warm. And maybe store these treats somewhere high if you want any left for tomorrow - even the top shelf isn't safe in my house full of cookie monsters!
Switch Things Up
I enjoy experimenting with different centers. Sometimes I go with white chocolate inside for a nice contrast. I tried a peanut butter center once and the kids went wild for them. Adding a tiny bit of mint extract to the chocolate filling makes them taste like fancy restaurant desserts. I even filled some with caramel once and though they were a bit messy to eat, nobody had any complaints!
Storage Secrets
They'll stay tasty in an airtight box for about a week if they stick around that long (they never do at my place). Put wax paper between layers so they don't get stuck together. You can freeze the cookies without filling for a couple months, just add filling after they thaw. They're perfect to make ahead for gatherings or when you know cookie cravings will hit - which is basically always in our home!
Frequently Asked Questions
- → How does measuring flour wrong affect cookies?
Too much flour toughens cookies and dries them out. Scooping straight from the bag fills the cup too tightly. Instead, spoon and level or weigh for the right amount.
- → Why cool the dough first?
Cooling it stops the cookies from spreading too much and keeps their indents intact. Skipping this might make them blob out in the oven.
- → Is reshaping while warm a must?
Puffling up misplaced shapes is easier when cookies are hot. Use a small cutter to gently nudge them back to neat circles and fix any thumbprints.
- → Can ganache be prepped early?
Totally! But as it sits, it thickens. If this happens, lightly warm it up again. Don’t overheat or you may ruin the texture by splitting it.
- → What makes Dutch cocoa special?
The Dutch process creates a richer color and a polished chocolate taste. Using standard cocoa works but changes the final flavor and look.