 Pin it
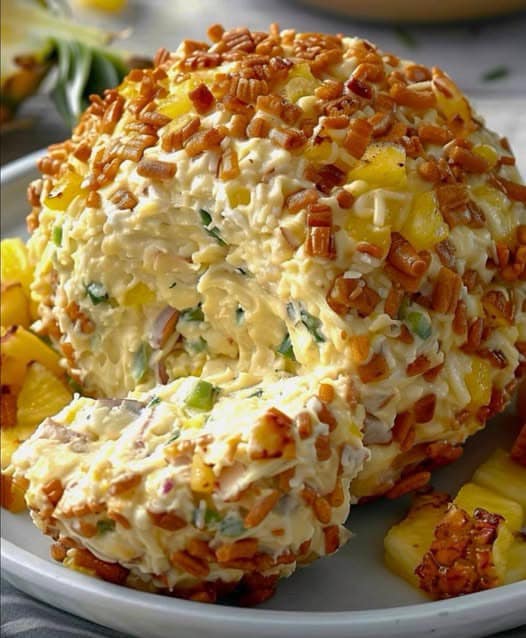
This tropical cheese ball brings a perfect balance of creamy, tangy, and crunchy elements that will have your guests asking for the recipe. The combination of sweet pineapple with savory cheese creates an irresistible flavor profile that works for any gathering, from casual game nights to elegant holiday parties.
I first made this cheese ball for a last-minute neighborhood potluck and it disappeared faster than anything else on the table. Now it's my signature appetizer that friends specifically request when they know I'm bringing something to share.
Ingredients
- Cream cheese: Provides the creamy base that holds everything together. Make sure it's fully softened for easy mixing and smooth texture.
- Crushed pineapple: Adds natural sweetness and tropical flavor. Thorough draining is crucial to prevent a soggy cheese ball.
- Green pepper: Contributes fresh crunch and vegetal notes. Choose firm peppers with vibrant color for best flavor.
- Onion: Delivers subtle sharpness that balances the sweet pineapple. Shallots can be substituted for a milder flavor.
- Seasoned salt: Brings all the flavors together. This ingredient is key for depth without overwhelming the other components.
- Walnuts: Create a delicious crunchy exterior. Toast them lightly before chopping for enhanced nutty flavor.
- Crackers and vegetables for serving: Allow guests to customize their experience.
Step-by-Step Instructions
- Prepare the Cheese Mixture:
- Combine softened cream cheese, well-drained pineapple, finely chopped green pepper, finely chopped onion, and seasoned salt in a medium mixing bowl. Use an electric mixer to thoroughly blend until completely smooth with no streaks of cream cheese remaining. The mixture will appear slightly speckled from the green pepper. Cover with plastic wrap and refrigerate for 30 minutes to firm up just enough for handling.
- Form the Cheese Ball:
- Remove the chilled mixture and place it onto a sheet of plastic wrap. Use the wrap as a tool to gather the mixture into a rough ball shape without handling it directly with your hands. The plastic wrap creates a barrier that helps you form a relatively smooth surface while keeping your hands clean. Continue shaping until you have a uniform ball.
- Coat the Cheese Ball:
- Spread chopped walnuts on a flat plate or shallow dish. Unwrap your cheese ball and gently roll it in the nuts, applying light pressure to help them adhere to the surface. Rotate frequently to ensure complete coverage. The nuts should completely cover the exterior, creating a textural contrast to the creamy interior.
- Chill and Serve:
- Wrap the nut-coated cheese ball in fresh plastic wrap and refrigerate overnight. This rest period is essential for flavors to meld and the ball to firm up properly. When ready to serve, place on a decorative plate surrounded by an assortment of crackers and fresh vegetables. Allow it to sit at room temperature for 15-20 minutes before serving for the best spreadable texture.
The drained pineapple is my secret weapon in this recipe. Most people are surprised when I tell them what gives this cheese ball its unique flavor profile. My grandmother used to make a similar version for our family Christmas gatherings, but her technique of thoroughly draining the pineapple overnight in a fine mesh strainer takes this appetizer to another level.
Storage Tips
The finished cheese ball keeps beautifully in the refrigerator for up to one week when properly wrapped. If you need to store it longer, avoid coating it with nuts until just before serving. The uncoated cheese mixture can be frozen for up to one month. Simply thaw overnight in the refrigerator, then shape and coat with nuts before serving. For the best flavor experience, always allow the cheese ball to sit at room temperature for about 20 minutes before serving to soften slightly.
Perfect Pairings
This cheese ball works wonderfully with a variety of accompaniments. For a traditional approach, butter crackers provide a neutral base that lets the cheese flavors shine. For a more contemporary spread, include thin slices of baguette, pretzel crisps, and cucumber rounds. The sweetness of the pineapple pairs beautifully with more robust crackers like wheat thins or multi-grain options. For a complete appetizer board, arrange the cheese ball alongside fresh fruit, olives, and a small bowl of honey for drizzling.
Customize Your Cheese Ball
The basic recipe serves as an excellent template for creating variations that suit your taste preferences. Consider substituting pecans for walnuts for a more buttery nut flavor. For a spicy kick, add a tablespoon of finely minced jalapeño to the cheese mixture. If you prefer a smoky element, incorporate a quarter cup of crispy bacon bits into both the mixture and the coating. During the holidays, dried cranberries and pistachios create a festively colored exterior that's perfect for Christmas gatherings.
Frequently Asked Questions
- → Can I substitute walnuts for another type of nut?
Yes, pecans or almonds are excellent alternatives to walnuts. You can also omit the nuts entirely if preferred.
- → How long can I store the cheese ball in the refrigerator?
The cheese ball can be stored in the refrigerator, tightly wrapped, for up to five days. Serve chilled for the best texture.
- → Can I make this cheese ball ahead of time?
Absolutely! The cheese ball can be prepared up to two days in advance and stored in the refrigerator until ready to serve.
- → What can I serve with the cheese ball?
Crackers, fresh vegetable sticks, pretzels, or slices of crusty bread pair well. Feel free to use your favorite dippers.
- → Can I use fresh pineapple instead of canned?
Fresh pineapple can be used, but ensure it’s finely crushed and thoroughly drained to prevent excess moisture.
- → Can I freeze the cheese ball for later use?
It’s not recommended to freeze the cheese ball, as the texture may change upon thawing. Prepare it fresh for the best results.
