
 Pin it
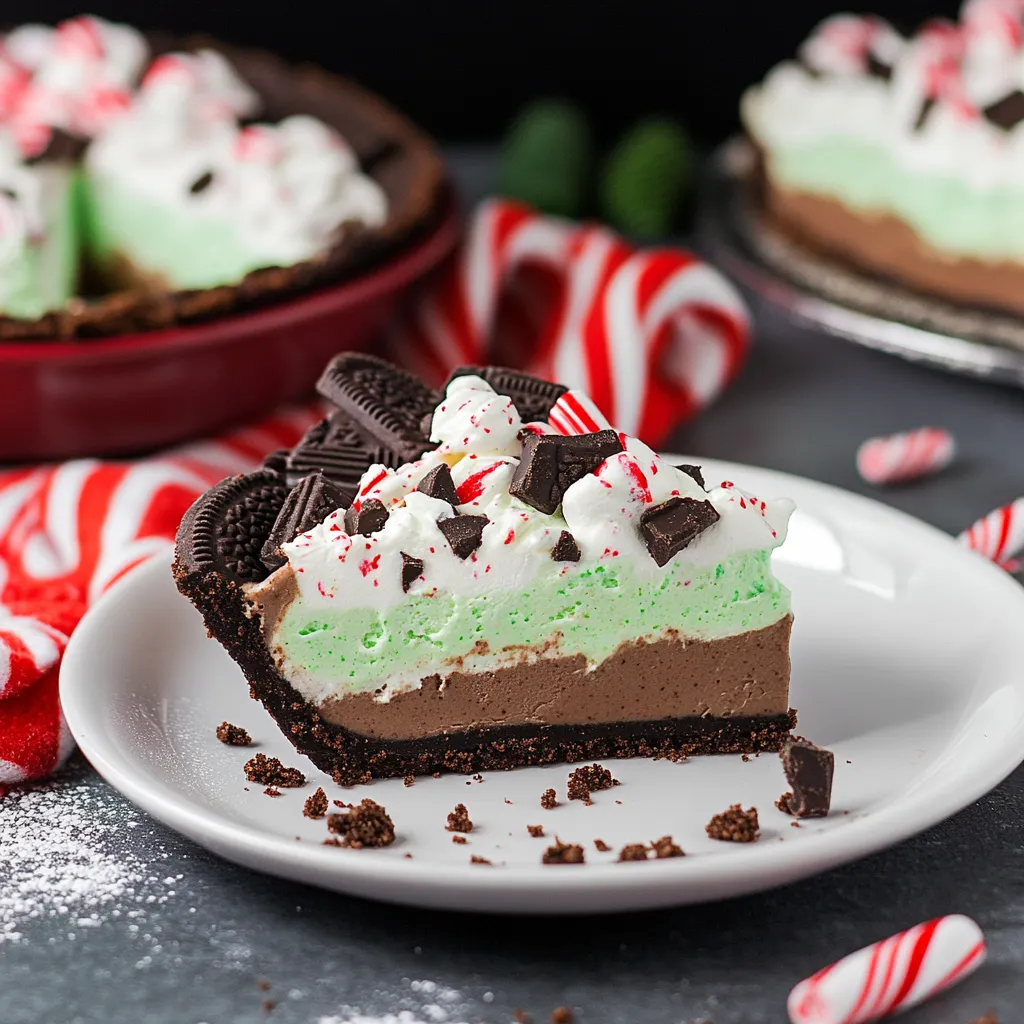
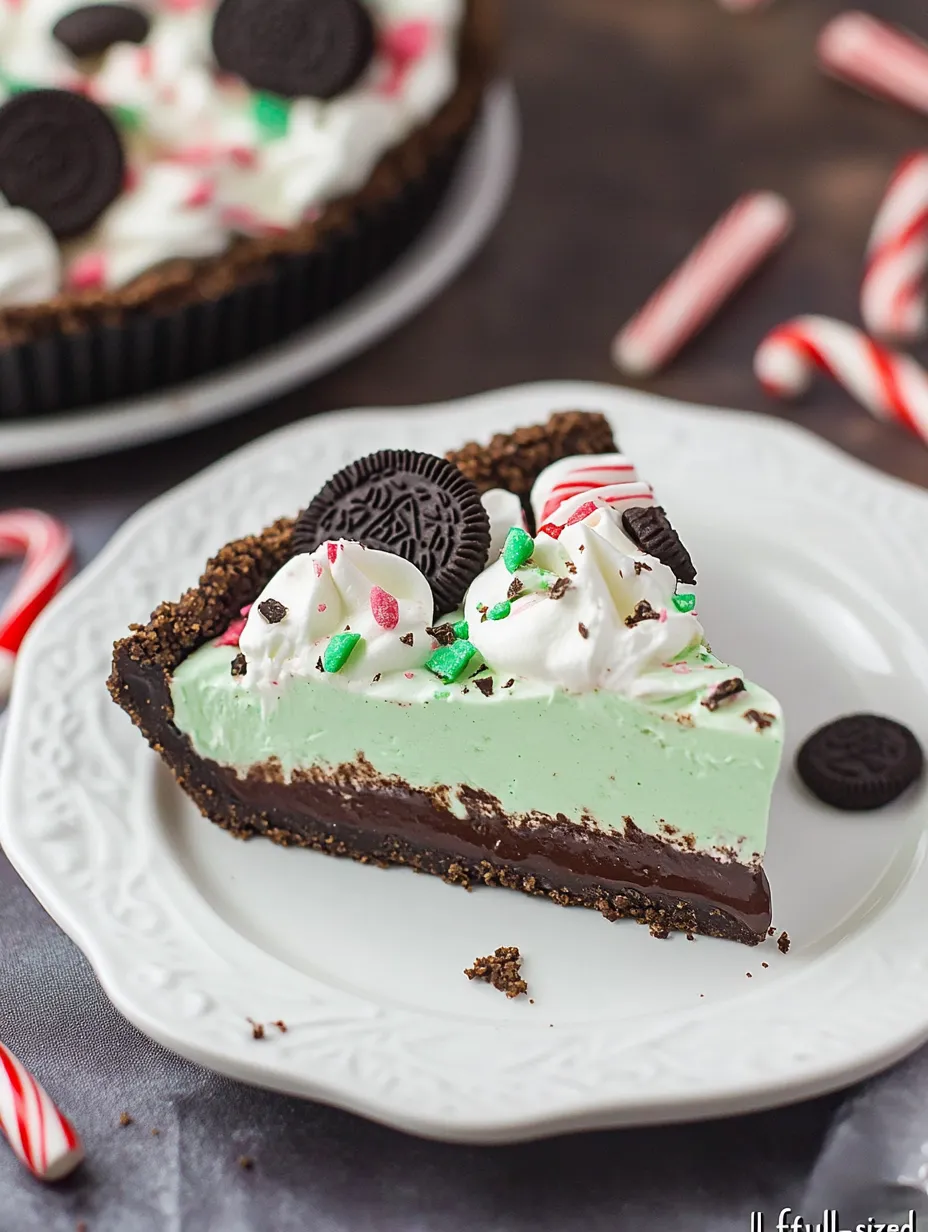
Whipping up a no-bake pie adds a carefree touch to holiday treats, and this Mint Chocolate delight hits just right with its deep chocolate flavor and refreshing peppermint kick. The mix of velvety chocolate filling, cool mint layer, and crispy Oreo base turns basic stuff into a showstopper dessert without even turning on your oven.
When we got together for the holidays last year, this pie was an instant hit. Even my nephew, who usually turns his nose up at minty sweets, went back for another slice and later wanted it for his birthday party.
Key Ingredients and Picking Pointers
- Oreo cookies: Stick with the original ones, not Double Stuf, for the best crust balance. Standard cookies give you that perfect chocolate foundation
- Frozen whipped topping: Make sure it's completely thawed in the fridge for the creamiest results. Rushing this step might leave your filling bumpy
- Hershey's chocolate bars: They melt just right for the perfect texture. Try dark chocolate bars too if you want something a bit more intense
- Peppermint extract: Go for the real stuff, not artificial, for that clean mint flavor without any weird aftertaste
- Candy canes: Grab traditional peppermint ones instead of fancy flavors to get that authentic minty punch
 Pin it
Step-by-Step Guidance
- Crushing Oreos:
- Start by smashing those Oreos into tiny bits. Toss them in a ziplock bag and bash with a rolling pin, working from middle to edges so your bag doesn't tear. You want all the crumbs about the same size for a solid crust.
- Making the Crust:
- Stir the Oreo bits with melted butter until they look like damp sand. Push firmly into your pie dish, getting an even layer all the way up the sides. The bottom of a measuring cup works great for this job.
- Creating the Chocolate Layer:
- For the chocolate part, slowly melt the Hershey's bars in the microwave, 30 seconds at a time, giving it a stir between zaps. Cool it for 5 minutes so it won't flatten your whipped topping when mixed.
- Making the Mint Layer:
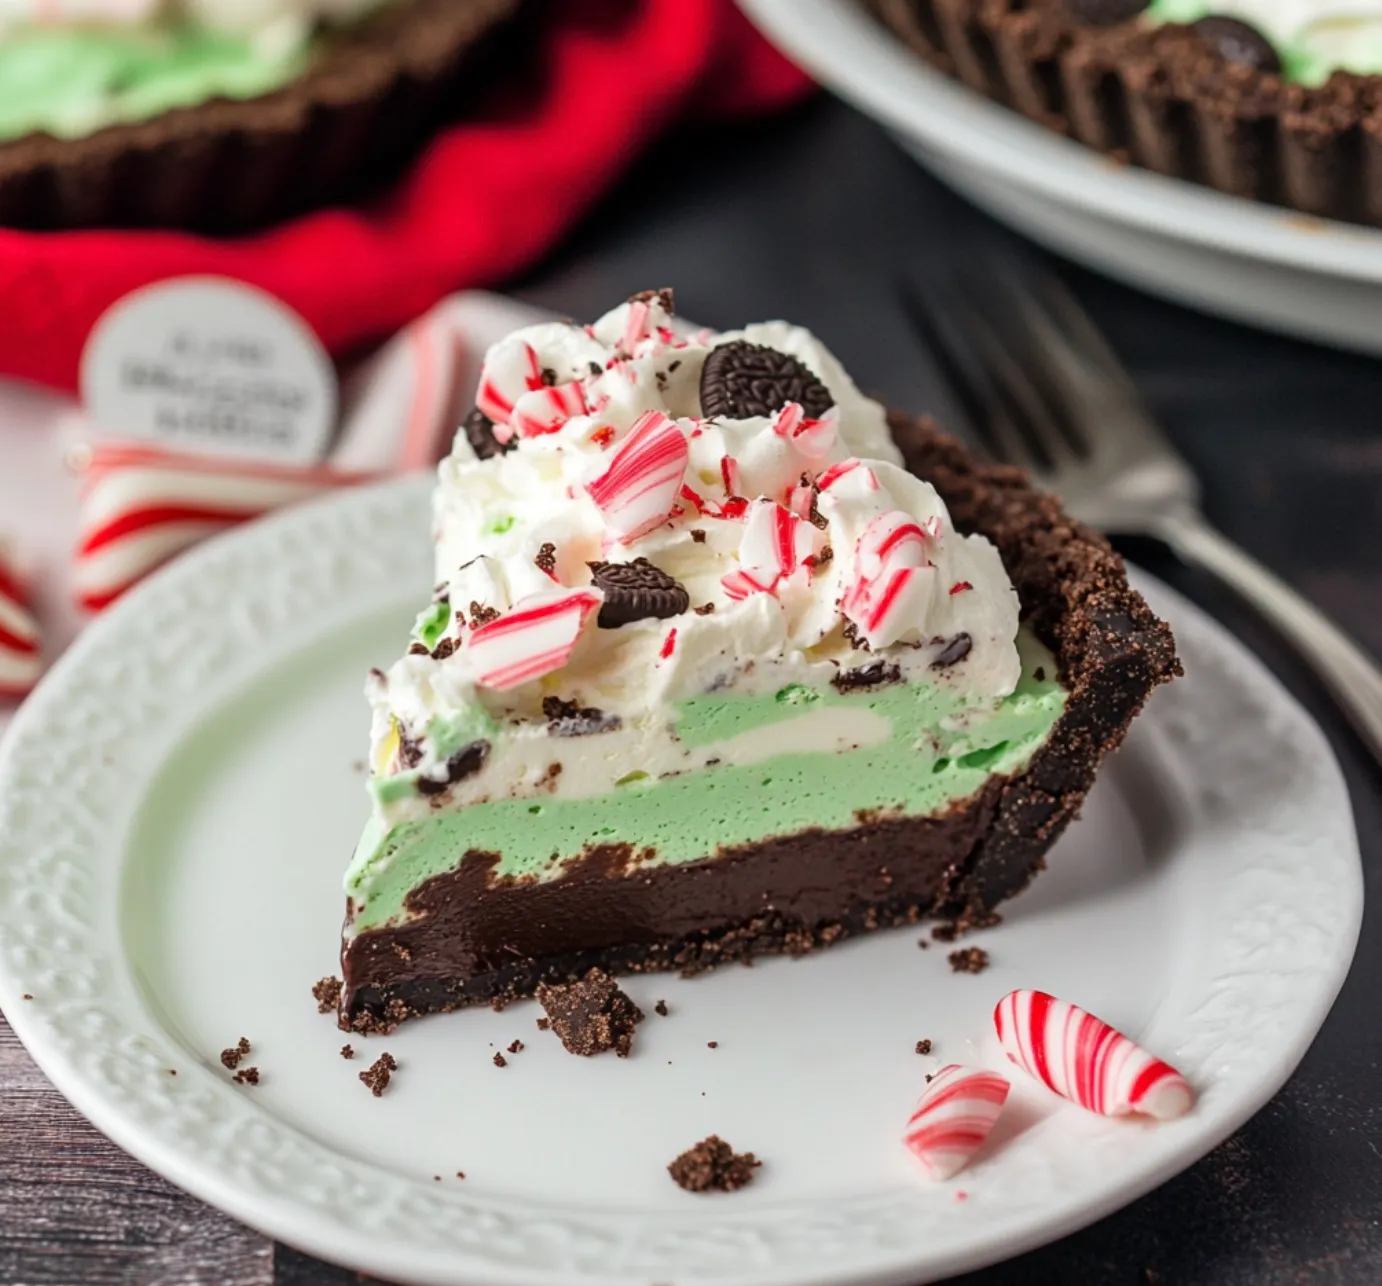
- Split the thawed whipped topping between two bowls. Fold melted chocolate into one half with gentle, sweeping motions to keep it fluffy. Don't mix too much or it'll go flat. In the other bowl, mix peppermint extract and green food coloring (if you want) into the remaining topping. Start light with the extract - you can always add more.
 Pin it
My grandma always claimed mint helps you digest food, which might explain why this pie feels lighter than other holiday desserts. When I was growing up, she'd hand out small slices of minty chocolate treats after big meals, saying they were "good for your tummy."
Going Beyond Basic
What's great about this pie is how flexible it is. The Oreo crust works as an awesome base for trying different chocolate types. I've made it with dark chocolate for a grown-up taste, and white chocolate for a striking color difference against the mint layer.
The texture gets even better over time, with the crust softening just enough while keeping its shape. This creates an almost truffle-like feel that makes every bite better than the last.
For fancy occasions, I've topped it with chocolate curls made by running a veggie peeler along a slightly warm chocolate bar. This easy touch makes it look extra special without any extra work.
After trying countless versions through many family get-togethers, this pie has earned its spot as a holiday must-have. It might look simple, but it packs a punch - people always stop mid-conversation to ask how to make it.
Tasty Drink Matches
You might think hot cocoa from the store would go nicely with this pie, but I've found a strong cup of dark coffee creates an amazing flavor combo. The coffee's bite perfectly balances the sweetness while bringing out more chocolate notes. When I have friends over, I love setting up a small coffee station next to this dessert.
Watch It Change Over Time
One cool thing about this pie is how its feel changes while it sits. The first creamy layers slowly blend into the crust, creating an almost ganache-like consistency around the edges. This shift adds another dimension to eating it, making day-two slices just as yummy as the first serving.
Prep-Ahead Perks
This recipe isn't just great because it's no-bake. I've noticed making it a day ahead actually makes it taste better. The mint gets time to spread through all the layers, and the filling sets to just the right cutting firmness. That's why it's perfect for busy holiday hosting.
Year-Round Tweaks
While this pie really shines during winter holidays, you can easily switch it up for any time of year:
- Skip the candy canes and use chocolate curls for springtime
- Top with fresh mint leaves during summer months
- Try seasonal Oreo flavors for fall celebrations
- Add white chocolate drizzle for a snowy winter look
Your first taste might remind you of those fancy after-dinner mints, but way better. The mix of smooth, creamy layers with the snap of the crust and toppings creates a texture journey that'll keep you coming back for more.
Storing In The Freezer
When you freeze single slices, wrap each piece on its own in plastic wrap, then foil over that. This double-wrap stops freezer burn and keeps all the delicate flavors locked in. Let frozen pieces thaw in the fridge overnight to get the texture back to perfect.
This no-bake mint chocolate pie has grown into more than just another recipe in my collection - it's my go-to crowd-pleaser that brings together childhood flavors with a classy look fit for any holiday table. Whether you're a kitchen pro or just starting out, this dessert shows that sometimes the easiest recipes create the most unforgettable moments.
Fun Serving Ideas
Turn this pie into a hands-on dessert experience by creating a topping station. Set out little bowls of smashed candy canes, chocolate shavings, whipped cream, and mint leaves. Let everyone jazz up their own slice, adding some fun to your dessert course. At family gatherings, this always gets people talking and makes sweet memories around the dessert table.
Getting The Heat Just Right
One cool thing about this pie is how it changes with temperature. While you need to keep it in the fridge, serving it at just the right warmth makes a huge difference. I've found that 12-15 minutes sitting out brings the flavors alive. The chocolate softens slightly, the mint pops more, and all the textures come together perfectly.
Other Crust Ideas
While the Oreo base is a classic, feel free to try these swaps:
- Graham cracker crust with a bit of cocoa powder mixed in
- Chocolate wafer cookies for a super dark foundation
- Mint Oreos to double up on the mint kick
- Chocolate graham crackers for something a little less rich
Each switch brings its own personality to the dessert while keeping that essential mint-chocolate harmony.
 Pin it
Fixing Common Problems
Knowing what might go wrong helps you nail it every time:
- If your filling looks gritty, your chocolate was probably too hot when you mixed it in
- Runny filling usually just needs more time in the fridge
- A crust that falls apart means you didn't use enough butter
- Uneven layers can be fixed by gently smoothing with a flat knife or spatula
I first made this recipe during a holiday cooking disaster when my oven quit working in mid-December. What started as a backup plan has turned into a beloved recipe that my friends and family now expect at gatherings. The easy prep plus fancy look makes it perfect for both casual family dinners and fancy holiday parties.
This no-bake mint chocolate pie shows what I love most about cooking - how basic ingredients, handled with care, can make something truly special. It proves that the most memorable desserts don't need fancy techniques or special gear, just a solid recipe and a bit of patience.
These tips come from making this pie tons of times, with each version teaching me something new about perfecting this seemingly simple dessert. Just remember, the best recipes become truly yours through practice and little tweaks along the way.
Frequently Asked Questions
- → Is it okay to prep this pie early?
- Absolutely, you can refrigerate it covered for up to 2 days.
- → Can I store this pie in the freezer?
- Sure, it’ll keep for 2 months. Just defrost in the fridge overnight.
- → What can I use if candy canes aren’t available?
- Crushed peppermint candies work great, or leave them off for a non-seasonal option.
- → Can I swap out the milk chocolate for dark?
- Definitely! Dark chocolate will give it a deeper flavor.
- → How long will this dessert stay fresh in the fridge?
- Keep it covered and it’ll last around 5 days.