
 Pin it
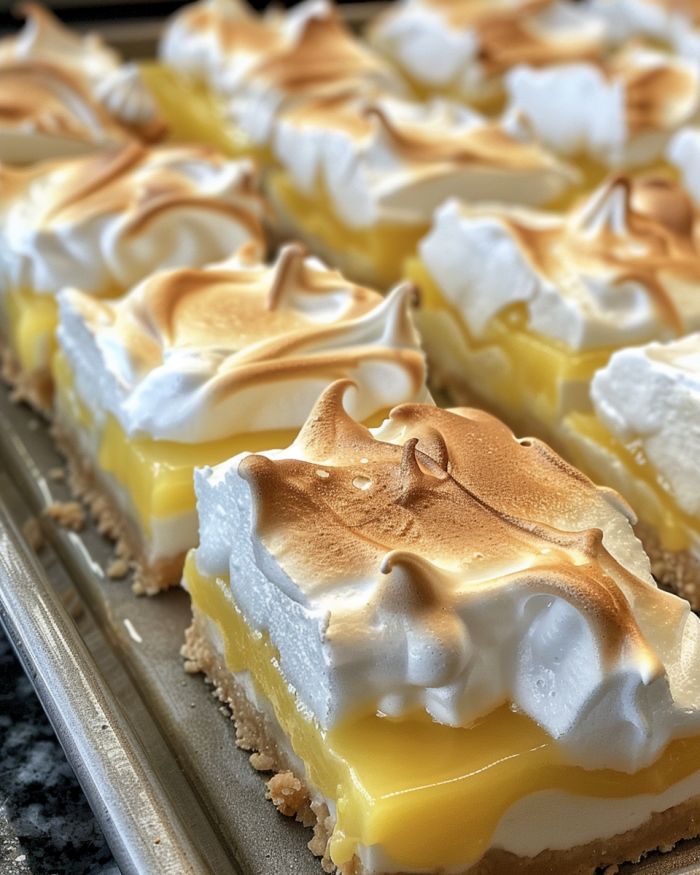
This lemon meringue pie bar recipe transforms the classic dessert into perfect portable squares with all the flavor you love but none of the fuss of traditional pie. The combination of buttery shortbread base, tangy lemon filling, and cloud-like meringue topping creates an irresistible treat that's ideal for gatherings or whenever you need a citrus fix.
I first made these bars for a summer garden party when I wanted something more elegant than cookies but less fussy than individual desserts. The empty platter and requests for the recipe told me everything I needed to know these have become my signature dessert for special occasions.
Ingredients
- Shortbread cookies: Create a buttery base that complements the lemon without competing with it; use pure butter cookies for the richest flavor
- Fresh lemon juice: Provides essential brightness; bottled juice simply cannot compare in flavor
- Lemon zest: Contains essential oils that intensify the citrus flavor; always use organic lemons when zesting
- Room temperature eggs: Incorporate more smoothly into the lemon filling, preventing lumps
- Egg whites: Form the foundation of the marshmallow topping; fresher eggs whip to greater volume
- Cream of tartar: Stabilizes the meringue, helping it maintain those beautiful peaks
- Granulated sugar: Dissolves into the meringue for a silky smooth texture; superfine sugar works even better if available
Step-by-Step Instructions
- Prepare the shortbread base:
- Process the shortbread cookies until they form fine crumbs, either in a food processor or by placing them in a sealed bag and crushing with a rolling pin. Mix thoroughly with melted butter until every crumb is moistened. Press firmly into your lined pan using the bottom of a measuring cup to create an even compact layer. The firm pressing prevents a crumbly base that would fall apart when sliced.
- Bake the crust:
- Place the crust in your preheated oven and bake just until it begins to turn golden at the edges, about 14 minutes. The partial bake ensures the crust holds together without becoming too crisp or brittle. A perfectly baked base will have a sandy shortbread texture that provides contrast to the soft lemon layer.
- Create the lemon filling:
- Combine sugar and lemon zest first, rubbing them together with your fingertips to release the essential oils in the zest. This technique dramatically intensifies the lemon flavor throughout the filling. Add lemon juice and whisk until the sugar begins to dissolve, then incorporate the eggs one at a time, whisking until the mixture becomes smooth and uniform with a silky texture.
- Bake the lemon layer:
- Pour the lemon mixture over the hot crust, which helps begin the setting process immediately. Return to the oven and bake until the filling is set around the edges but still has a slight jiggle in the center. This careful timing ensures your filling achieves the perfect consistency, neither too firm nor too loose. The lemon layer will continue to set as it cools.
- Create the marshmallow meringue:
- Heat egg whites and sugar over simmering water, whisking constantly until the mixture reaches approximately 140°F. This Swiss meringue method partially cooks the egg whites while dissolving the sugar completely, resulting in an exceptionally stable and glossy meringue. Transfer to a stand mixer and whip until stiff, glossy peaks form and the bowl feels cool to the touch.
- Finish with toasted meringue:
- Spread the meringue over the chilled lemon bars, creating decorative swirls and peaks with the back of a spoon. These peaks will toast beautifully, giving visual interest to your dessert. Use a kitchen torch to carefully toast the meringue until golden brown, moving constantly to prevent burning. The toasting adds a marshmallow flavor that contrasts beautifully with the tart lemon.
The fresh lemon is truly the star of this recipe. I discovered the technique of rubbing zest into sugar from my grandmother who insisted this step was the secret to her famous lemon desserts. The first time I tried these bars with her method the difference was remarkable the lemon flavor seemed to bloom throughout the entire filling rather than just providing acidity.
Make-Ahead Tips
The shortbread base and lemon layer can be prepared up to two days ahead and stored in the refrigerator tightly covered. I recommend adding the meringue topping within a few hours of serving for the best texture and appearance. The meringue will gradually soften in the refrigerator though the bars will still taste delicious even after a day or two.
Ingredient Swaps
If fresh lemons are unavailable, you can substitute other citrus fruits with delicious results. Meyer lemons create a sweeter, milder filling while blood oranges produce a beautifully colored version with less tang. For a key lime variation, replace the lemon juice and zest with fresh lime, reducing the sugar to 1¼ cups to account for the increased acidity.
Serving Suggestions
These bars are stunning when garnished with small strips of candied lemon peel or fresh berries for a pop of color. For an elevated dessert experience, pair with a scoop of vanilla bean ice cream or a dollop of lightly sweetened whipped cream. They make a beautiful conclusion to a spring or summer meal, especially when served on a white platter with fresh mint leaves for contrast.
Storage Guide
The fully assembled bars will keep in the refrigerator for up to three days though the meringue will gradually soften and lose its toasted quality. For longer storage, prepare only the shortbread and lemon layers which can be frozen for up to one month when wrapped tightly in plastic and foil. Thaw overnight in the refrigerator and add fresh meringue before serving.
Frequently Asked Questions
- → How do I ensure a sturdy crust for the bars?
Firmly press the shortbread crumb mixture into the pan and bake as directed. Make sure all edges are evenly packed to create a solid base.
- → Can I use bottled lemon juice instead of fresh?
Freshly squeezed lemon juice is highly recommended for the best flavor. Bottled juice lacks the brightness needed for this dessert.
- → How do I prevent my meringue from deflating?
Ensure the egg whites are room temperature and whip them to stiff peaks. Also, avoid overmixing or handling the meringue after it's prepared.
- → What if I don't have a kitchen torch for browning the meringue?
You can brown the meringue by placing it under the broiler for 1-2 minutes. Watch closely to prevent burning.
- → How can I make cleaner cuts for serving?
Use a sharp knife dipped in hot water and wiped clean between each cut. This helps create neat squares without crumbling.
- → Can these bars be made ahead of time?
Yes, you can make them up to 3 days in advance. However, the meringue's texture may soften over time, so add it closer to serving for best results.