
 Pin it
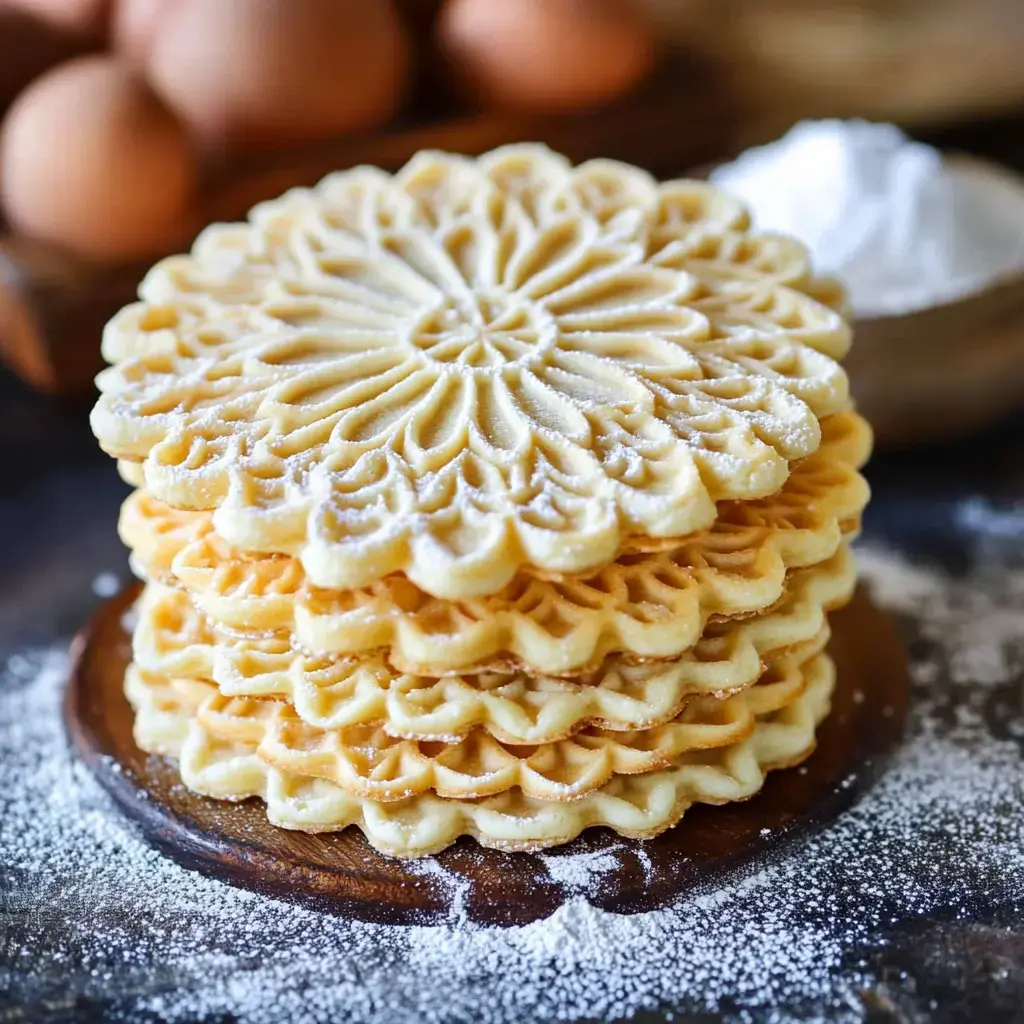
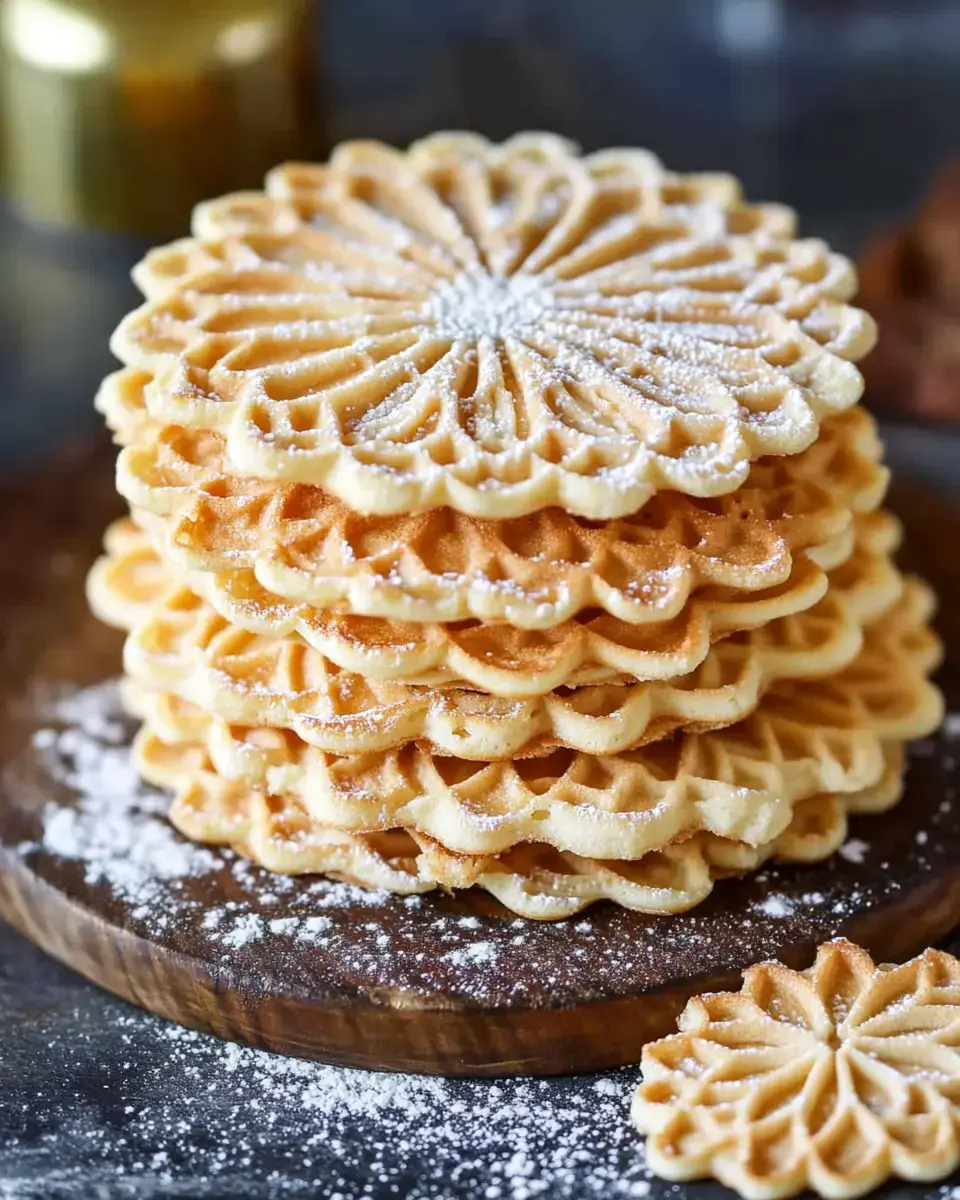
These delicate Italian Pizzelle are wonderfully crispy treats with stunning patterns baked right in. You'll easily make these classic Italian cookies using a modern press, giving them a light, buttery feel with flavors you can tweak using vanilla, anise, or almond extract. They're great for giving as gifts during the holidays or enjoying alongside your morning coffee, carrying on the rich tradition of Italian baking through the generations.
What Makes These Cookies Special
These pizzelle have just the right amount of sweetness with lovely vanilla or anise notes. Your pizzelle press will stamp gorgeous, detailed designs that make them look as good as they taste. They stay nice and crisp for quite a while, making them perfect for gifting or serving at any celebration. And don't worry about complicated steps—you can whip these up with just a handful of simple ingredients you probably already have.
What You'll Need for Pizzelle
- Liquid Components:
- 3 large eggs at room temperature
- 3/4 cup white sugar
- 1/2 cup melted unsalted butter, cooled down
- 1 teaspoon vanilla extract (swap for 1/2 teaspoon anise/almond extract if preferred)
- Powder Components:
- 1 3/4 cups regular flour
- 1 teaspoon baking powder
- 1/4 teaspoon salt
- Tools You'll Want:
- Pizzelle iron
- Cooling rack
- Small scoop or teaspoon
- Thin spatula for lifting cookies
Easy Preparation Guide
- Mix Your Batter
- Beat the eggs and sugar till light and fluffy. Add the cooled butter and your chosen extract. Mix flour, baking powder, and salt in another bowl. Slowly fold dry mix into wet ingredients just until combined. Let it sit for half an hour.
- Get Your Press Ready
- Turn on your pizzelle press and let it warm up following the maker's guidelines. Most new presses don't need greasing, but add a light coat if yours tends to stick.
- Bake Your Cookies
- Put a small spoonful of batter in the middle of each design on the press. Shut the lid and wait 30-60 seconds until they turn golden.
- Let Them Set
- Gently lift each cookie with a spatula onto your cooling rack. They'll get crispier as they cool. If you want shaped cookies, bend them while they're still warm.
Expert Cookie Tricks
Let your batter cool in the fridge for better color and crunch. Use the same amount of batter each time for matching cookies. Move fast when you're shaping warm pizzelle. Wipe down your press between batches if needed. Cook them longer for darker, crispier cookies or less for softer ones. Don't stack them while cooling or they'll get soggy.
 Pin it
Tasty Ways to Share
Enjoy pizzelle with a hot drink. Sprinkle some powdered sugar on top before eating. Make little sandwich cookies using Nutella or cannoli cream. Pack them in clear bags or pretty tins when giving as gifts. Put parchment paper between layers so they don't stick together. They look beautiful on holiday cookie trays or at any special event.
Keeping Your Cookies Fresh
Keep them in a sealed container at room temp for up to 2 weeks. Don't store them near anything moist or they'll go soft. You can put the batter in the fridge for a day before baking. The finished cookies can go in the freezer for up to 3 months if wrapped well. Just let them warm up to room temp before serving.
Frequently Asked Questions
- → Why let the batter rest?
Letting the batter sit gives the flour time to soak properly, improving the texture for crunchier cookies.
- → Can I prepare the batter earlier?
Yep, you can refrigerate it overnight. Just pull it out 30 minutes beforehand so it softens up a bit.
- → How do I know when they’re ready?
They’ll be a light golden brown in about 1 to 1.5 minutes, but the timing depends on your iron.
- → Why do they harden as they cool?
They start soft when warm, but as they cool, the moisture disappears, leaving them perfectly crunchy.
- → Is it necessary to spray the iron every time?
For non-stick presses, the butter in the mix usually prevents sticking after the first spray.
Conclusion
Crisp Italian-style wafer treats with a vanilla base, cooked until golden in a special iron. Great for gatherings or casual snacking.