
 Pin it
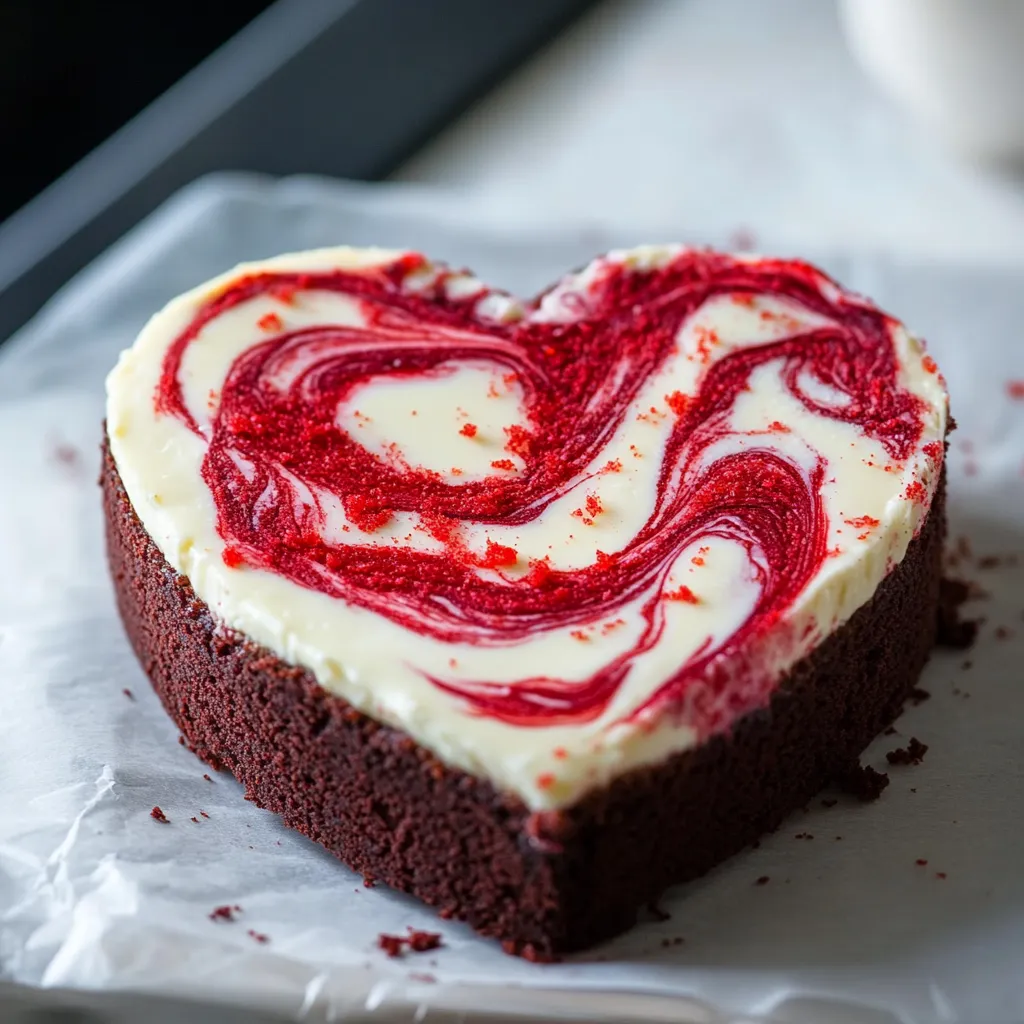
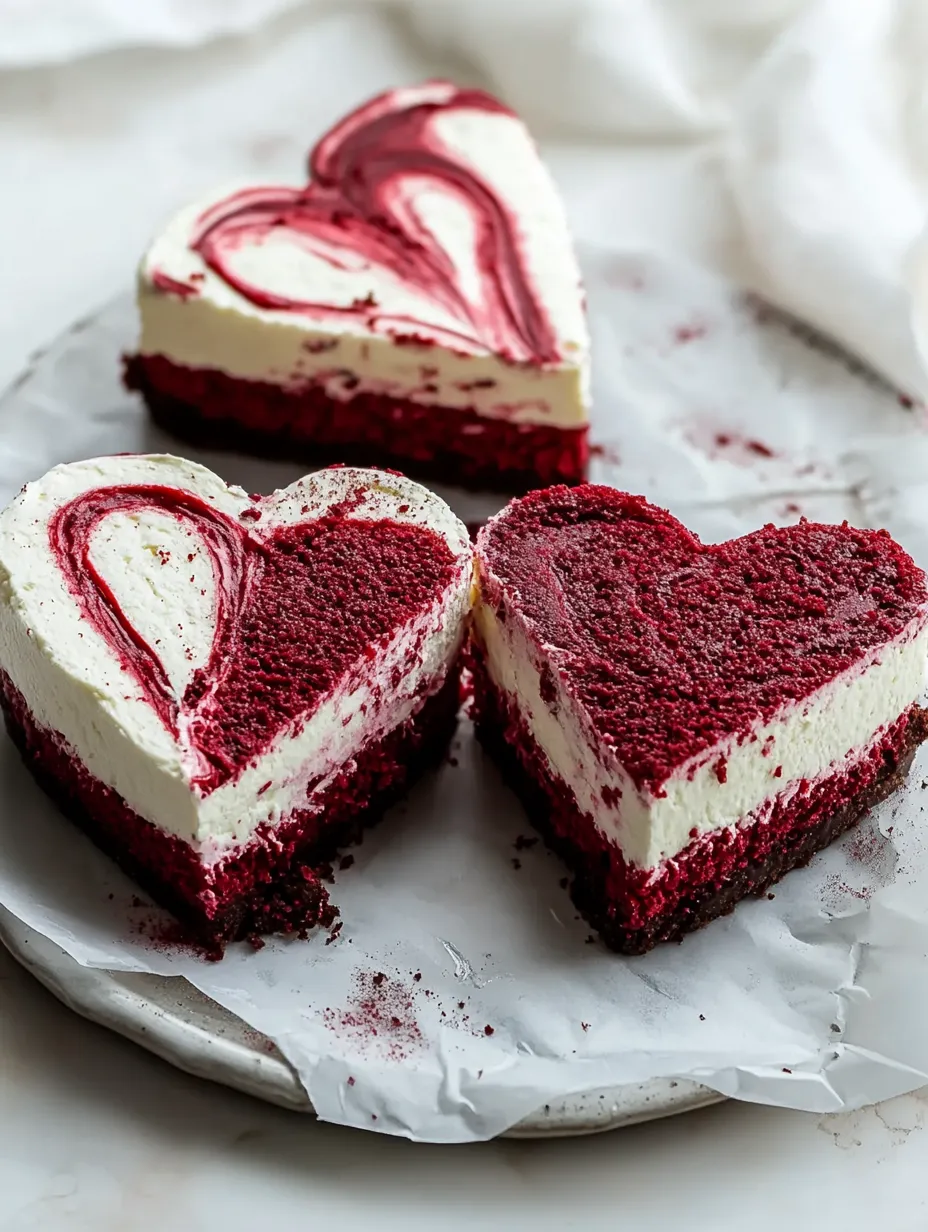
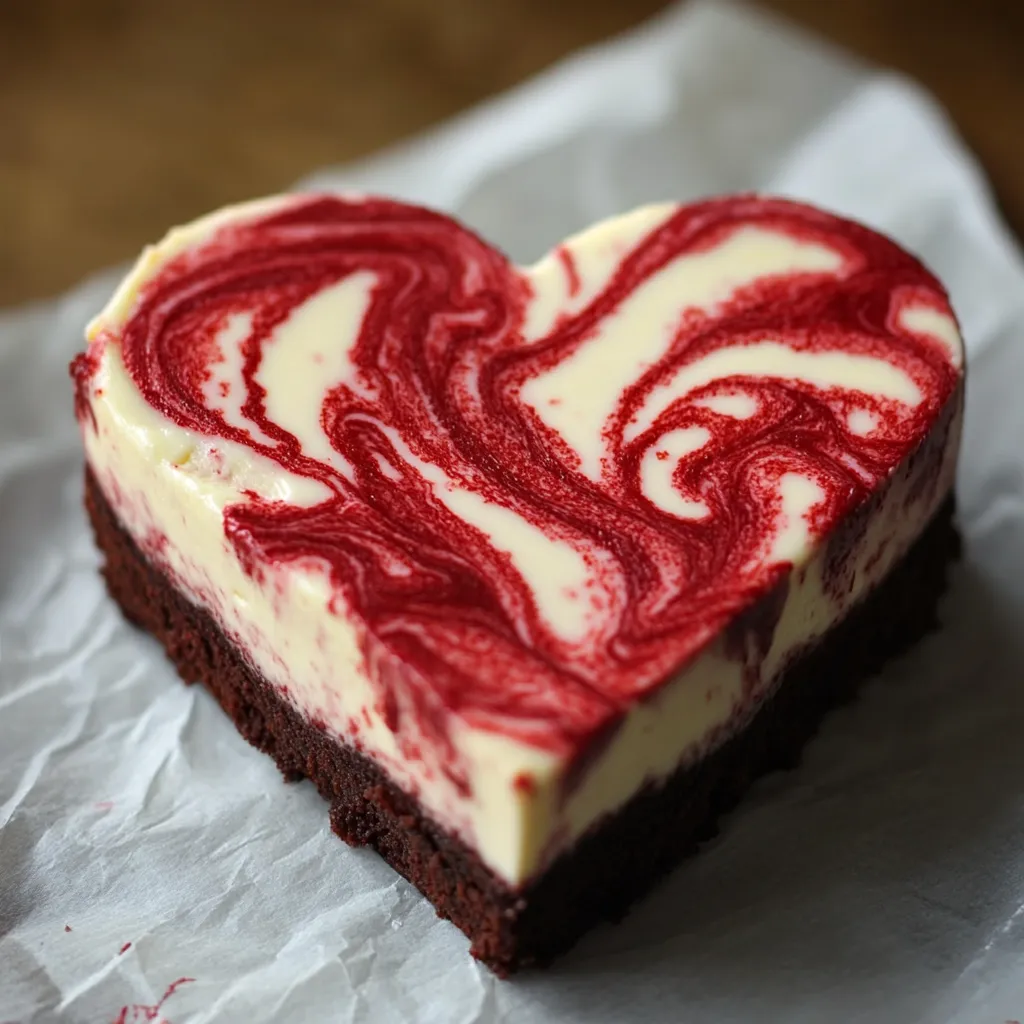
This stunning Red Velvet Cheesecake marries the classic appeal of red velvet cake with rich, creamy cheesecake in one spectacular dessert. When sliced, it reveals beautiful contrasting layers - a moist crimson base supporting a silky smooth cheesecake top, creating an eye-catching centerpiece that tastes as remarkable as it looks.
The first time this cheesecake appeared at our family gathering, everyone paused to admire its striking appearance before eagerly requesting a slice. The dramatic contrast between deep red cake and pristine white cheesecake creates an unforgettable presentation that never fails to impress guests.
Key Ingredients
- Cream Cheese: Full-fat, softened - Philadelphia brand recommended
- Unsalted Butter: Premium European-style preferred
- Eggs: Large, room temperature
- Chocolate: Quality semisweet, finely chopped
- Flour: All-purpose, measured carefully
- Vanilla: Pure extract only
- Food Color: Professional gel type
- Greek Yogurt: Whole milk variety
Preparation Method
- 1. Preparation:
- Set oven to 325°F with center rack position. Bring ingredients to room temperature. Prepare 9-inch springform pan with grease and parchment. Double-wrap pan exterior with foil. Set up separate stations for melting, mixing and assembly. Pre-measure all ingredients.
- 2. Cake Base:
- Melt butter and chocolate in double boiler until smooth. In separate bowl, combine dry ingredients. Beat butter and sugar in stand mixer until fluffy. Add eggs individually, scraping bowl between additions.
- 3. Mixing:
- Add dry ingredients and buttermilk alternately to butter mixture, beginning and ending with dry ingredients. Incorporate vanilla and red coloring gradually to achieve deep red shade. Ensure thorough mixing.
- 4. Cheesecake Preparation:
- Beat cream cheese until completely smooth. Add sugar gradually while mixing. Incorporate eggs one at a time. Add vanilla and zest. Mix until silky but avoid overbeating.
- 5. Final Assembly:
- Spread red velvet batter in pan. Layer cheesecake mixture on top. Place in water bath. Bake approximately 75 minutes until edges set but center retains slight movement.
 Pin it
Professional Insights
- Achieving Perfect Texture:
- Years of experience have shown that texture excellence comes from proper temperature control and careful technique. Room temperature ingredients and patient mixing create that coveted silky smoothness.
- Water Bath Benefits:
- The water bath method prevents surface cracks while ensuring even baking. The moist heat environment protects the delicate texture and helps achieve professional results.
- Temperature Guidelines:
- Proper ingredient temperature is crucial for success. Cream cheese should be thoroughly softened but not warm. This attention to detail ensures proper incorporation and texture.
Critical Tips
- Keep oven door closed throughout baking
- Look for slight wobble in center when done
- Cool slowly to prevent cracking
- Use only room temperature ingredients
This cheesecake has become a cherished part of our family celebrations. The careful layering process creates a dessert that's as beautiful as it is delicious, making every special occasion even more memorable.
 Pin it
Pro Tips
- Double-wrap springform pan in heavy foil
- Chill thoroughly for clean slicing
- Allow first layer to set briefly
- Infuse sugar with vanilla bean
- Use gel coloring for best results
This Red Velvet Cheesecake represents the perfect fusion of classic desserts. The layered approach creates a stunning presentation while maintaining the distinct characteristics of both red velvet cake and cheesecake. Success comes from attention to detail and respect for proper technique, resulting in a dessert that consistently impresses and delights.
Frequently Asked Questions
- → Can I prepare this recipe in advance?
- Absolutely! You can make it up to 3 days early. Store it chilled in the fridge, and only cut the shapes out before serving.
- → What should I do with the leftover pieces?
- Don’t toss them! The scraps are perfect as bite-sized snacks or even crumbled over some ice cream.
- → Is it okay to freeze these brownies?
- Yep, you can freeze the whole batch or individual portions for up to 2 months. Just let them thaw in the fridge overnight when you're ready.
- → Why is Greek yogurt added to the cheesecake?
- It gives the cheesecake a tangy boost and helps achieve a creamier, smoother consistency.
- → Can I switch to a different type of food color?
- Sure thing! However, gel food color is your best option for a bold, vibrant shade without messing with the batter’s texture.