
 Pin it
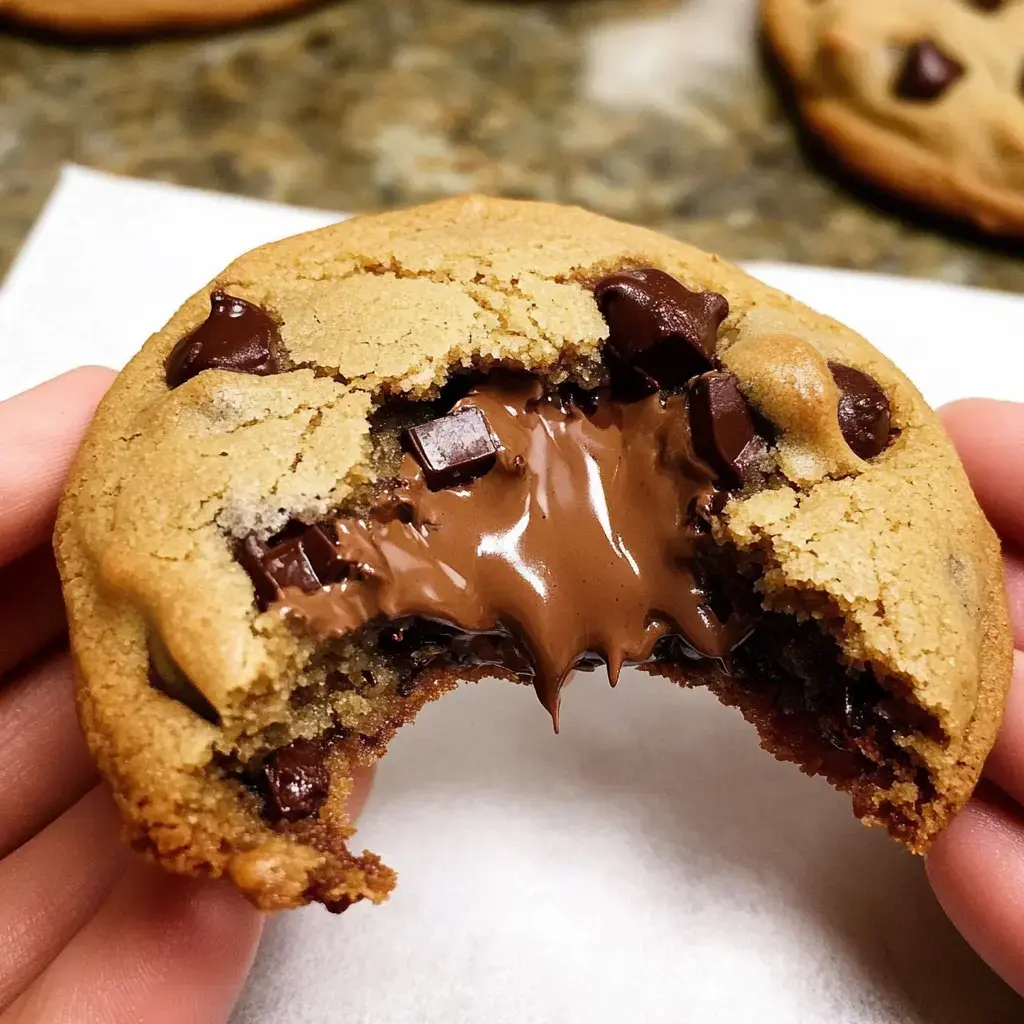
I gotta tell you about my go-to cookie creation that makes everyone smile from ear to ear. These Hazelnut Chocolate Filled Cookies started when I couldn't sleep one night and decided to bake. Now they're what people always ask me to bring. Think of biting into a soft cookie packed with chocolate chips and finding gooey melted hazelnut spread inside. It's a little taste of magic in each bite, and they're surprisingly simple to whip up.
What Makes Them Extra Special
The thing that really sets these cookies apart is how all the textures work together. You get that slight crunch around the edges, an amazingly soft middle, and that melty chocolate hazelnut center that feels like pure luxury. They might look like you spent hours making them, but between us, they come together really fast whenever you need a chocolate fix.
What You'll Need
- Hazelnut Chocolate Spread: We'll pop it in the freezer first to keep it from running everywhere during baking.
- Flour: Just grab the regular kind from your pantry, nothing special needed here.
- Brown Sugar: This brings that lovely toffee flavor and keeps everything nice and chewy.
- Unsalted Butter: The foundation of any good cookie, giving that rich flavor we all love.
- Baking Soda: A little bit goes a long way to give that perfect rise.
- Honey: My little trick for cookies that stay soft even the next day.
- Egg: Take it out of the fridge early so it blends better with everything else.
- Chocolate Chips: Because we can never have too much chocolate goodness.
- Vanilla Extract: It makes everything taste better, you'll see.
- Salt: Just a tiny bit to make all those flavors stand out.
How To Make Them
- Step 1: Get The Filling Ready
- Drop generous spoonfuls of hazelnut spread onto a lined sheet, press them down slightly and stick them in the freezer. Let them sit there for at least 60 minutes until they're hard to touch.
- Step 2: Mix Your Cookie Base
- Combine all your dry stuff in one bowl. In another, mix your melted butter, sugar, vanilla and honey together. Throw in the egg, stir it up good, then gently fold in your dry mixture. Let it chill in the fridge until it's not sticky anymore, about 90 minutes.
- Step 3: Put It All Together
- Take your cold dough and break it into 10 equal chunks. Flatten each piece, put a frozen chocolate disc in the middle, then wrap the dough around it and make sure it's sealed tight. Roll them into balls and stick some chocolate chips on the outside.
- Step 4: Into The Oven
- Put them on your baking sheet with room between each one and bake at 350°F for about 12 minutes. You want golden edges but a slightly pale middle. Let them sit on the hot tray for 10 minutes before moving them anywhere.
Tricks For Amazing Results
- Don't rush the freezing part or you'll end up with chocolate everywhere but where you want it.
- I know waiting for dough to chill isn't fun but it seriously makes your cookies turn out way better.
- Make sure you completely seal the dough around that frozen filling or it'll find a way to escape.
- Don't crowd your baking sheet, these cookies like to spread out as they bake.
Ways To Enjoy
There's nothing better than eating these cookies while they're still warm and the filling is all gooey. They're fantastic with a glass of cold milk, but they also go great with your morning coffee or even better, try them with a scoop of vanilla ice cream on top. They'll stay good in a container for up to three days, though at my place they never hang around that long.
Why These Ingredients Work
I always pick brown sugar for these because it gives that extra chewiness we all want. That small amount of honey is the secret to keeping them soft for days after baking. The baking soda helps create those perfect crispy edges, and don't even think about skipping the vanilla or salt, they really bring all the flavors together.
Fun Twists To Consider
I sometimes shake things up by using creamy peanut butter or cookie spread instead of the hazelnut stuff. During Christmas I'll throw in some cinnamon with the dough and top them with white chocolate chunks. Once you get comfortable with the basic method, you can really get creative with what you stuff inside.
Frequently Asked Questions
- → Why is 15 minutes important after baking?
This timing lets the edges crisp up nicely while the Nutella stays melty without being too runny.
- → Why should Nutella be frozen first?
Chilled Nutella is easier to wrap in the dough and stays in place as the cookies bake.
- → How long can these cookies last?
They'll stay delicious for up to 3 days in an airtight container, keeping the ideal texture.
- → Why add honey or corn syrup?
It helps to caramelize the cookies for a golden color and keeps the inside soft and chewy.
- → What should I do with soft dough?
If the dough feels sticky, refrigerate it for about 1.5 hours to firm up before shaping. Keep extra dough chilled while you work.