
 Pin it
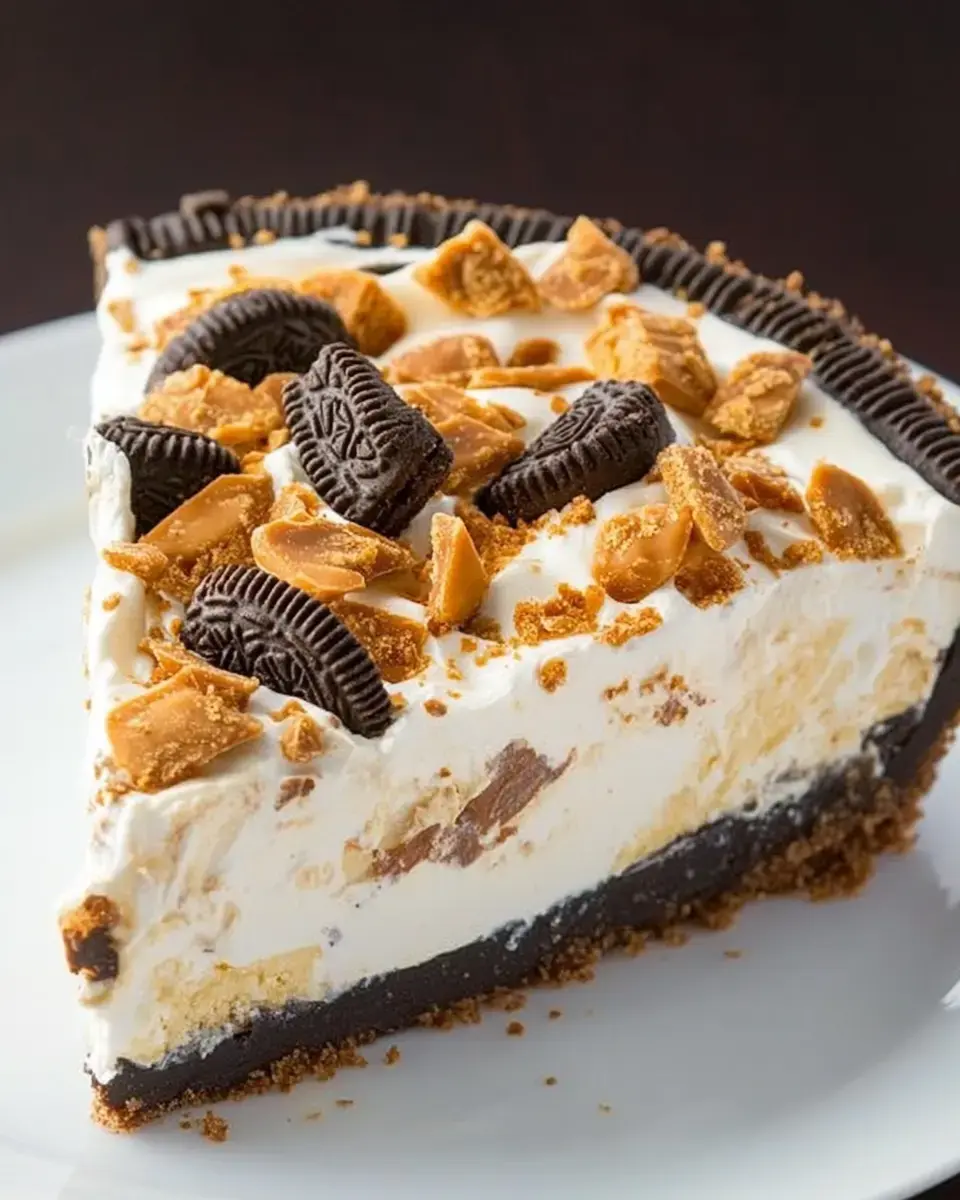
Say hello to an amazing sweet treat: Butterfinger Pie. This fuss-free delight blends the addictive taste of Butterfinger candy with a smooth, velvety filling inside a decadent Oreo cookie base. Great for any event, it's easy to whip up and will wow everyone. For parties or solo indulgence, this smooth-meets-crunchy dessert will quickly become a go-to favorite.
The Magic Behind Butterfinger Pie
Butterfinger Pie hits the spot for anyone who loves peanut butter treats. You'll fall for how the light, airy filling mixes with bits of crunchy Butterfinger and that dark Oreo base in every mouthful. The best part? You won't need to fire up your oven. It's fast, straightforward, and ideal when you want something impressive without much work. Anyone can make this flexible, crowd-pleasing dessert their own way.
What You'll Need for Butterfinger Pie
- Oreo Cookies: Pulverized into tiny bits for a chocolate-rich foundation.
- Butter: Liquefied to bind the cookie crumbs together.
- Heavy Whipping Cream: Beaten until fluffy for an airy, silky texture.
- Vanilla Extract: Brings a gentle sweetness to your whipped topping.
- Powdered Sugar: Makes the cream layer perfectly sweet.
- Cold Milk: Blends with vanilla pudding to create a silky center.
- Instant Vanilla Pudding: Forms the foundation of your smooth, rich filling.
- Butterfinger Bits: Delivers that distinctive crunch throughout. Buy them ready-chopped or smash up full candy bars yourself.
Creating Your Oreo Base
- Start Your Base
- Turn Oreos into fine powder using your food processor or by putting them in a plastic bag and smashing them with a rolling pin. Mix these crumbs with melted butter until completely wet. Push this mix firmly into a 9-inch pie dish, making sure it's level and compact. Put it aside.
Putting Together Your Filling
- Beat Your Cream
- With a mixer, beat heavy cream and vanilla until it forms stiff peaks. Split this whipped cream into two parts, one for mixing in and one for the top.
- Add Some Sweetness
- Mix powdered sugar into half the whipped cream. This will be your top layer later.
- Mix Your Pudding
- In another bowl, blend cold milk with vanilla pudding mix until it thickens nicely. Gently fold in the plain whipped cream portion until fully combined. Mix in most of your crushed Butterfinger pieces, saving some for the top.
 Pin it
Put It All Together and Chill
- Build Your Pie
- Dump the pudding and cream mixture onto your Oreo base, spreading it flat. Add the sweetened cream on top, either spooned or piped. Scatter your leftover Butterfinger chunks across the surface.
- Let It Set
- Wrap the whole thing in plastic and stick it in the freezer for 6-12 hours until solid. This makes sure you can cut clean slices when it's time to eat.
Enjoying Your Butterfinger Creation
When you're ready to eat, take the pie out and let it sit for about 20-30 minutes so it softens a bit. Cut it into slices and dig in. If you don't finish it all, just cover what's left with plastic wrap or pop it in a sealed container in the freezer for up to a month. This ahead-of-time dessert works great for busy days or special moments, so you'll always have something tasty waiting to wow your guests.
Frequently Asked Questions
- → How long will it stay fresh in the freezer?
- It'll last about 2 months if you wrap it up tight. Cover it with plastic wrap and foil to keep out freezer frost.
- → Can I swap out the Butterfinger candy?
- Yes! Try Snickers, Reese's, or Heath bars. Just make sure to chop them up before mixing in.
- → Why let it sit out before serving?
- Leaving it at room temp for 20-30 minutes softens it a bit, making slicing and eating way easier.
- → Can I use store-bought whipped topping?
- Sure thing, but homemade whipped cream has a better texture. Prepared topping might make the pie a bit different.
- → What if I don’t have a deep pie dish?
- A springform pan works just as well. Extra mix? Chill it and enjoy later as a bonus dessert.