
 Pin it
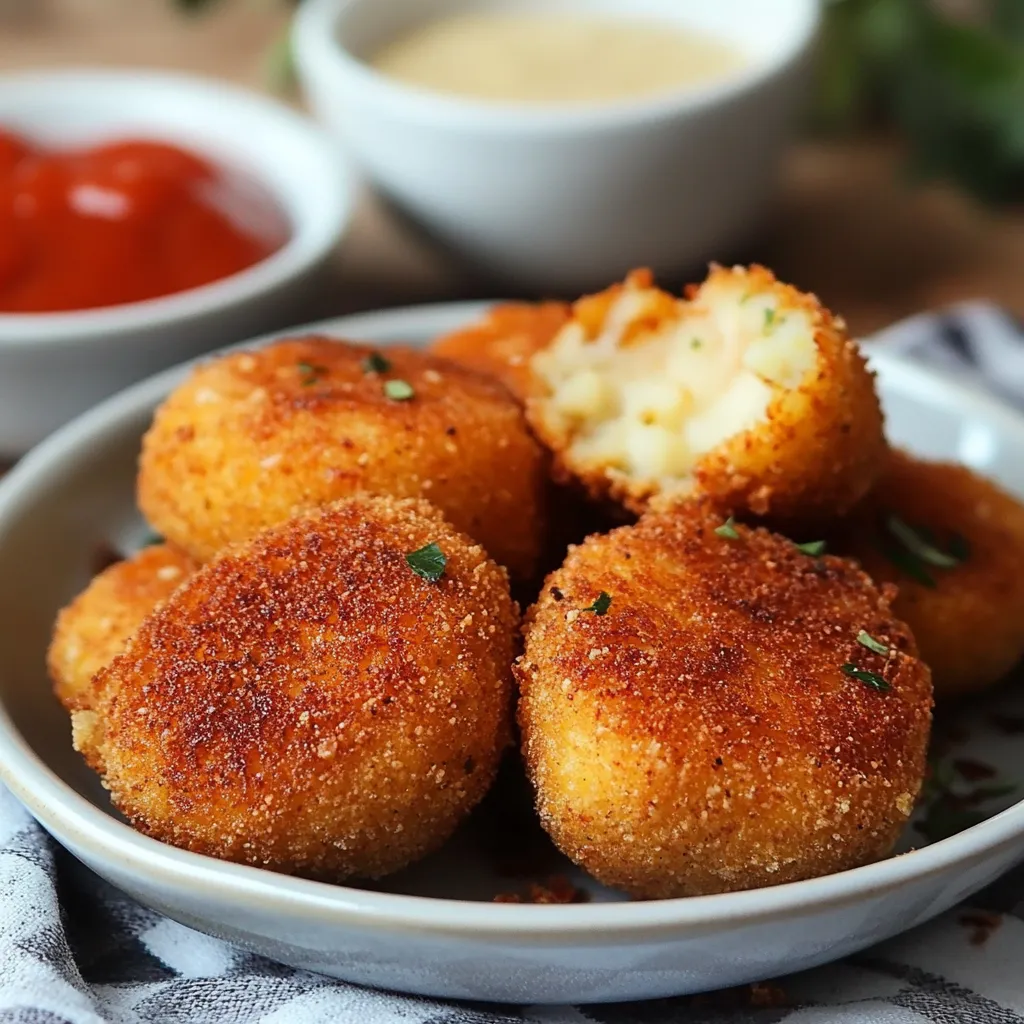
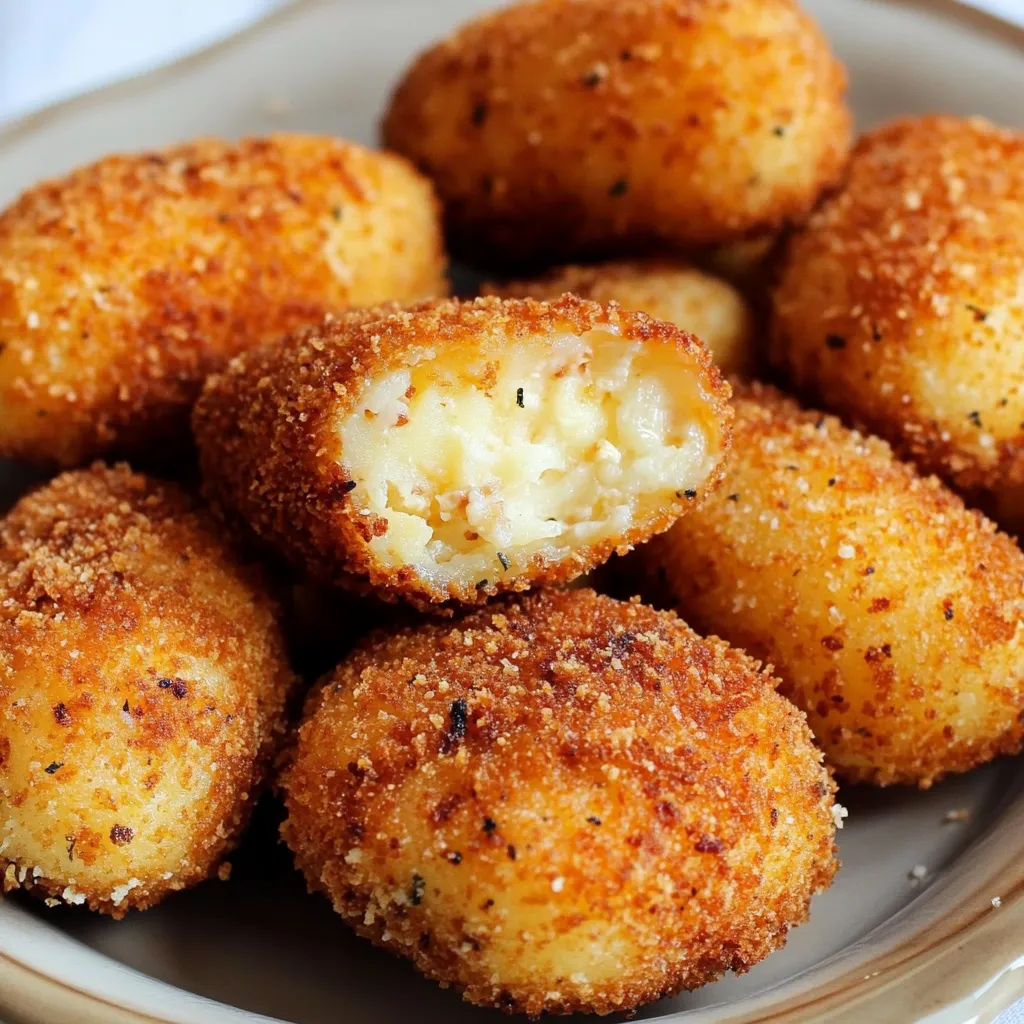
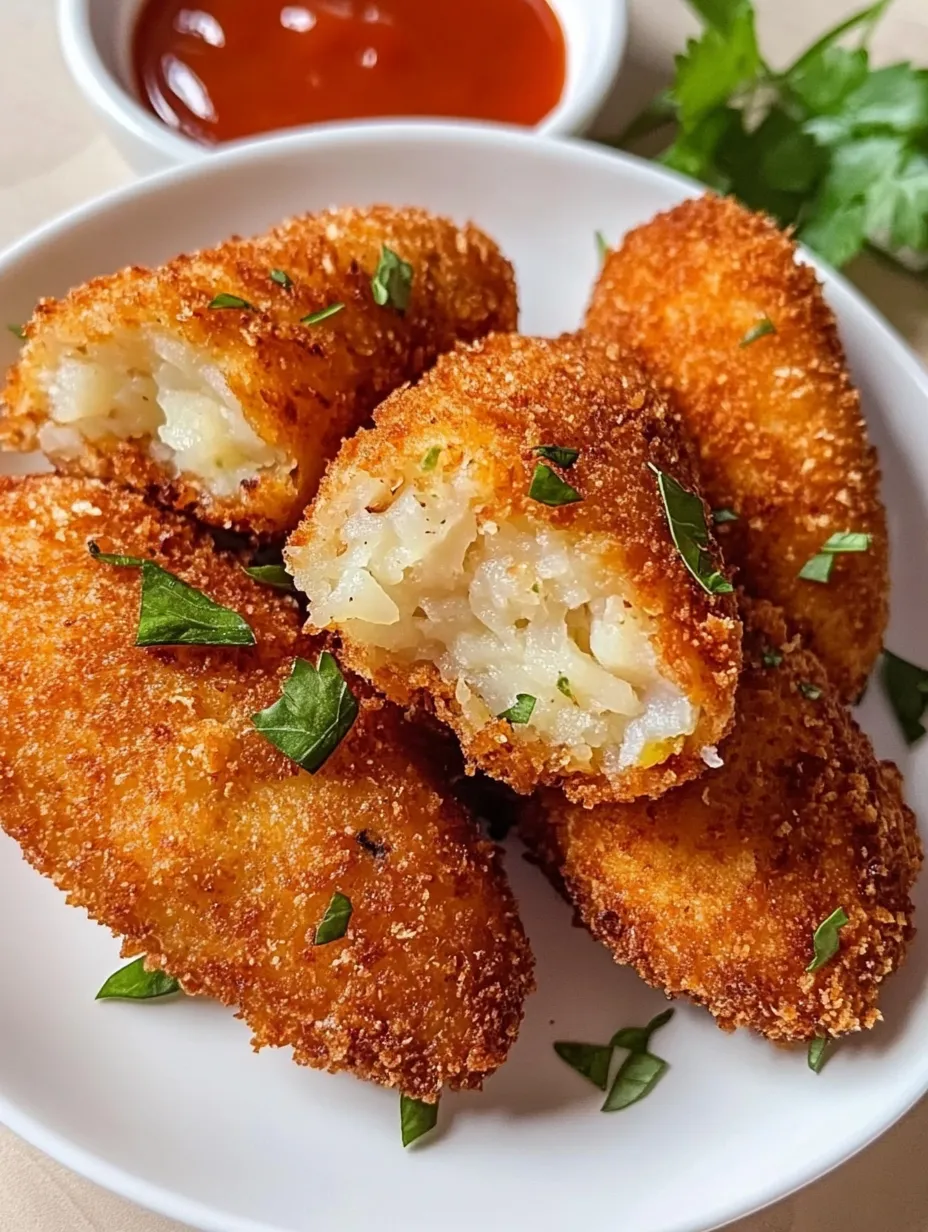
Crunchy on the outside, smooth on the inside - these chicken and potato bites hit all the right notes. They bring together a thin, crispy coating with a soft, well-flavored center. Getting the shape right and frying until golden creates an amazing texture contrast. Success comes from good chilling time between steps and keeping your oil at the right temp throughout. Enjoy them as fancy finger food or a laid-back snack - they work great either way.
Whenever I bring these croquettes to family parties, they're gone in seconds. What makes them so popular? The trick is coating them twice and giving them enough time to chill between steps. My mother-in-law used to doubt anyone could make good croquettes at home, but now she asks for them at every holiday meal.
Perfect Ingredient Choices
- Go with Russet potatoes for the fluffiest middle
- Thigh meat works better than breast for richer taste
- Panko breadcrumbs give you the best crunch
- Try Gouda or Gruyere for smooth melting
What makes these croquettes stand out is using top-notch ingredients. Adding fresh herbs kicks up the flavor, while choosing the right potatoes gives you the texture you want. After trying lots of versions, I can tell you that spending a bit more on good breadcrumbs really makes a difference in how crunchy they turn out.
Step-By-Step Cooking Guide
- 1. Getting Potatoes Ready
- Cook whole potatoes in salty water until they're fork-tender. Drain and peel while they're still hot - the skin comes off easier this way. Push through a ricer or mash them completely, but don't overwork or they'll get sticky. Spread them out on a baking sheet to cool faster. Your potato base should be totally smooth with no lumps for the best texture. Add salt and white pepper while warm so the flavor spreads evenly.
- 2. Prepping Your Chicken
- Gently simmer chicken thighs in water with some bay leaf, peppercorns, and garlic. Cook just until done, around 15-20 minutes. Cool in the cooking liquid to keep it juicy. Pull apart using two forks, making sure pieces are even but not too small. You want it loose and fluffy, not packed down. Season the chicken on its own before mixing with potatoes.
- 3. Putting It All Together
- Mix your cooled potatoes and chicken in a big bowl. Add grated cheese while everything's still a bit warm so it melts slightly. Season well with salt, pepper, and whatever herbs you like. Test by making a small ball - it should hold together without being too sticky. If needed, add a little breadcrumbs to get the right feel.
- 4. Forming and Coating
- Shape mixture into even cylinders or ovals, about 3 inches long. Put shaped croquettes on a parchment-lined tray and chill for 30 minutes. Set up three bowls: seasoned flour, beaten eggs mixed with milk, and seasoned breadcrumbs. Keep one hand for dry stuff, one for wet. Coat each croquette twice for extra crunch.
- 5. Cooking Them Up
- Heat oil to exactly 350°F with a thermometer. Fry croquettes in small batches, turning carefully until golden brown, about 3-4 minutes. Drain on a wire rack over a baking sheet. If you prefer baking, spray with oil and cook at 400°F for 15-20 minutes, flipping halfway. Keep your cooking temperature steady throughout for the best results.
- 6. Serving and Keeping
- Eat right away while they're hot and crispy. Serve on a platter with dips like garlic aioli, spicy mayo, or herb sour cream. Want to make ahead? Freeze uncooked croquettes on a tray until hard, then put in freezer bags. When ready to eat, fry straight from frozen, adding 2-3 minutes to cooking time.
 Pin it
Tasty Flavor Options
Mix in cooked mushrooms and browned onions for extra flavor. Throw in fresh herbs like dill, parsley, or thyme. Try different cheese combos - sharp cheddar with gruyere, or manchego with mozzarella. Add roasted garlic or sun-dried tomatoes for a taste of the Mediterranean. Season with unique spice blends: curry powder, Cajun mix, or Italian herbs. Toss in finely chopped spinach or roasted peppers for color and nutrients.
Smart Prep Strategies
Split your prep over two days for best results. First day: cook and shred chicken, make mashed potatoes, get seasonings ready. Second day: mix filling, shape, and coat croquettes. You can freeze uncoated croquettes for up to three months. For parties, coat frozen croquettes the day before serving. Warm up cooked croquettes in a 350°F oven until crispy, about 10 minutes. Keep warm in a 200°F oven for up to an hour.
 Pin it
Fixing Common Problems
Mixture too wet? Slowly add more breadcrumbs. Too dry? Stir in a bit of cream or broth. Breaking apart while frying? Cool in fridge for 30 minutes. Coating falling off? Make sure croquettes are completely dry before breading. Oil not hot enough? Get a thermometer to check. Browning unevenly? Turn croquettes while cooking. Middle still cold? Make smaller croquettes or cook a bit longer.
Impressive Serving Ideas
Put croquettes on warm plates with sauce drizzled in patterns. Top with micro greens or fresh herbs. Stack three at angles for height. Serve over lightly dressed arugula or watercress. Add color with pickled veggies or roasted cherry tomatoes. For buffets, place in paper cups with parchment liners. Offer different sauces in squeeze bottles so guests can create pretty designs.
 Pin it
Closing Thoughts
These croquettes blend comfort food with party-worthy appetizers. Getting them right comes down to proper prep, watching temperatures, and not rushing between steps. They'll wow folks at casual family dinners or fancy get-togethers thanks to their professional look and satisfying bite. The basic recipe lets you get creative while still keeping that magical crispy-outside, creamy-inside contrast that makes everyone reach for seconds.
Frequently Asked Questions
- → Could I bake them instead?
- Sure, coat lightly with oil and bake at 400°F for about 20 to 25 minutes, flipping halfway.
- → Is freezing them possible?
- Absolutely! Freeze before frying. Lay them flat on a tray to solidify, then pop them into a freezer-safe bag.
- → Why chill them before cooking?
- It helps the coating stick better and keeps them in shape when frying.
- → What cheese is best to use?
- Opt for cheeses that melt well, like mozzarella, cheddar, or jack.
- → Can I make tinier pieces?
- Of course! Adjust the size, but don’t forget to tweak the cooking time.