
 Pin it
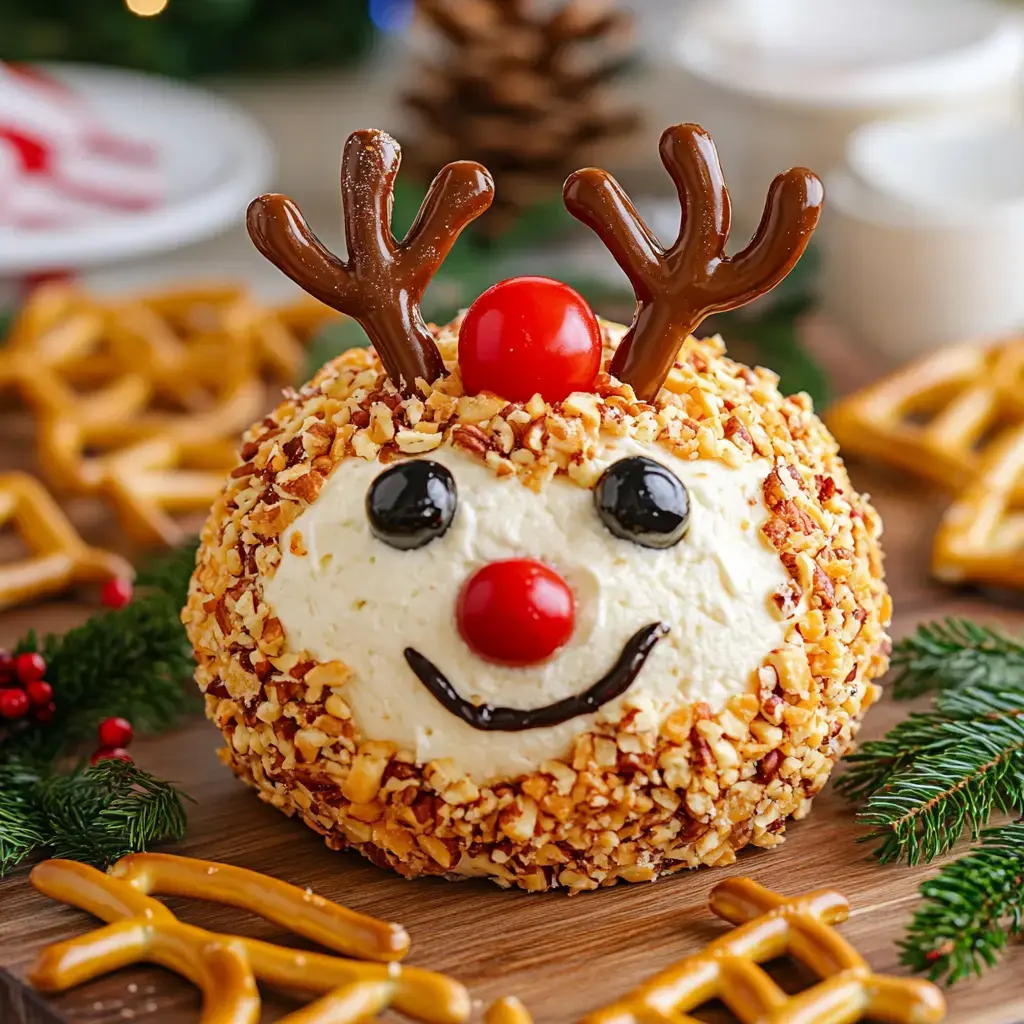
I stumbled onto this cute reindeer cheese ball idea when I needed something fun for my kids' school Christmas party. Now we can't go through the holidays without it! The kids have a blast putting it together, and other parents always want to know how to make it. It's the most adorable app you'll ever see - just a tasty cheese ball turned into Rudolph with pretzel sticks for antlers and a little tomato nose. People constantly snap photos before they start eating it at gatherings.
What Makes This Festive Snack So Popular
The best thing about this cheese ball isn't just how cute it looks - it tastes incredible too! You won't believe how good cream cheese mixed with sharp cheddar and ranch seasoning can be. My hubby always tells me we should make a backup because the first one vanishes so quickly. My children love decorating it, and I live for the moment guests first spot it on the table. And since I can fix it up beforehand, it's a real lifesaver during those crazy holiday weeks.
Everything You'll Want For This Project
- Cream Cheese: Two blocks left out to soften so they'll blend smoothly
- Sour Cream: A small amount (quarter cup) for extra smoothness
- Cheddar Cheese: Go for sharp varieties to kick up the taste
- Ranch Mix: Begin with two tablespoons and adjust to your liking
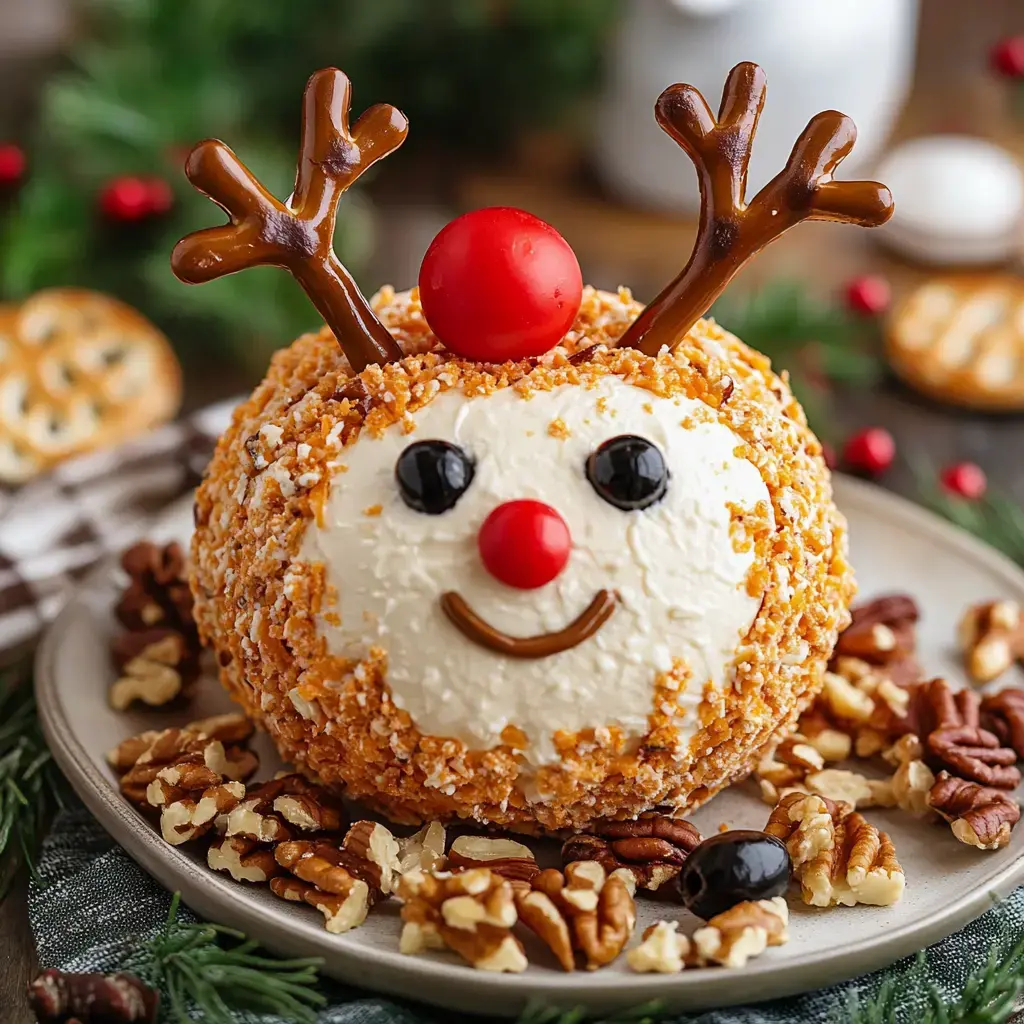
- Pecans: Cut them very small so they stick to the outside nicely
- For Decorating: Grab some black olives for the eyes, a small tomato for that red nose, and pretzels to make antlers
- Final Touch: Consider fresh herbs around the plate for a fancy presentation
Building Your Own Festive Deer
- First Steps
- I start by whipping the cream cheese with sour cream until completely smooth. Then I mix the cheddar and ranch powder in. My little girl always wants to taste it to check if we've got the ranch balance right!
- Patience Required
- Cover everything in plastic wrap and form into a ball shape. Stick it in your fridge for several hours, or leave it overnight if you're planning ahead.
- Adding Texture
- Once it's completely firm, roll the ball in your chopped pecans. The kids think this part's fun even though it gets their hands messy.
- Transformation Time
- Now comes the magic of turning it into Rudolph! Add those pretzel antlers on top, place the olive eyes, and don't forget the bright red tomato nose. Sometimes I use small toothpicks to keep everything secure.
- Time To Enjoy
- Set it on a nice serving dish, surround with various crackers and fresh veggies, then watch everyone smile when they see it!
Try These Variations
I play around with this recipe differently each holiday season. Last year I swapped in pepper jack instead of regular cheddar and everyone couldn't get enough of that spicy twist. When my sister hosts kids with nut allergies, she coats hers with smashed pretzels instead. Sometimes I throw in a bit of garlic powder or even tiny bits of cooked bacon. The real joy comes from trying new flavors while keeping that sweet reindeer appearance.
 Pin it
Creative Decoration Ideas
My children thought of using those small candy eyes rather than olives and it turned out super cute. We've even made entire reindeer families using different-sized cheese balls. At our Christmas Eve get-together last December, I shaped it like a snowman and decorated it with veggie features. You can really do so many things with this idea, and it's such a wonderful activity to share with kids.
Secrets For Success
Let me share a few tricks I've picked up along the way. Make sure your cream cheese is completely soft before you start or you'll end up with chunks. Don't skip the cooling time - I learned this when I rushed once for a classroom party and poor Rudolph kept losing his nose! Keep your creation refrigerated until about half an hour before guests arrive, as it spreads better when slightly warmed up.
Final Assembly Steps
When you're ready to finish your reindeer, push small indentations for the eyes and nose so they'll stay in place better. I always stick the antlers in at the very end, and sometimes cut the pretzels shorter if they seem too large. Sprinkling some fresh parsley or rosemary at the bottom creates the look of a festive forest. My daughter loves to add a tiny red ribbon where the neck would be.
Create A Stunning Display
Half the fun is how you show it off. I like to place various colored crackers in a circle around my reindeer. Sometimes I add small tomatoes and cucumber pieces arranged like Christmas decorations on the tray. For my daughter's class party, I used strips of green and red peppers to make it more festive. The key is making it look so good people aren't afraid to dig in!
Storage Solutions
A cool thing about this cheese ball is you can make it early and just add the decorations right before your party. The cheese mixture stays good in your fridge for nearly a week. If you happen to have some left (which hardly ever happens at my house), just remove the decorative bits and pop it in a sealed container. It's actually really tasty crumbled into morning eggs the next day. Just don't tell your kids they're eating Rudolph for breakfast!
Frequently Asked Questions
- → How soon can I prep it?
- Prepare the cheese base a few days early, but put decorations on right before serving so it looks fresh.
- → Why soften cream cheese?
- Soft cheese mixes way easier and doesn’t lump up with the other ingredients.
- → Trick to shaping the ball?
- Wrap it up in plastic to shape the ball cleanly, then chill it so it stays round.
- → Decorations not sticking?
- Secure parts like the eyes or antlers with toothpicks or press them firmly in so they hold.
- → Non-nut coating ideas?
- Swap nuts for crushed crackers or breadcrumbs for a crunchy alternative without nuts.