 Pin it
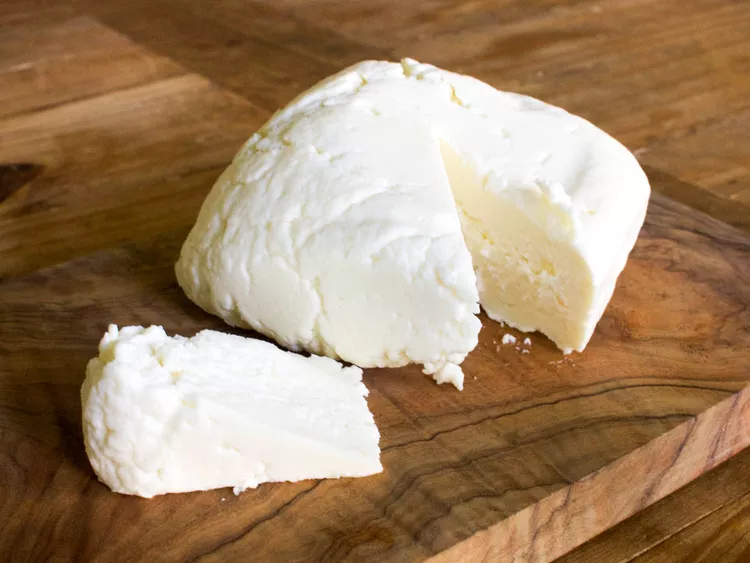
This homemade queso fresco recipe transforms everyday ingredients into a fresh, versatile cheese that will elevate your Mexican dishes to restaurant quality. The simple process yields delicious results that store-bought versions simply cannot match.
I first made this queso fresco when planning a taco night for friends and couldn't find quality cheese at my local market. The reactions around the table when I mentioned the cheese was homemade made the simple process completely worthwhile.
- Whole milk: Look for milk that is not ultra-pasteurized as the proteins need to be intact for proper curdling. Local dairy options often work best for this recipe.
- Fresh lemon juice or white vinegar: Fresh lemon juice produces a slightly milder flavor while vinegar creates a more neutral taste. Either works perfectly as your acid component.
- Kosher or table salt: Salt is not just for flavor but helps preserve your cheese. Sea salt flakes make an excellent finishing touch if you have them on hand.
Step-by-Step Instructions
- Prepare Your Workspace:
- Set up your draining station by lining a colander with four layers of cheesecloth or the alternative materials. Place the colander over a large bowl to catch the whey. Having this ready before you begin heating the milk ensures you can work quickly when the curds form.
- Heat The Milk:
- Pour the gallon of milk into a large pot and heat over medium-low heat. Stir frequently to prevent scorching and maintain an even temperature distribution. Use your thermometer to monitor until the milk reaches between 165 to 180°F. This temperature range is crucial for proper protein coagulation.
- Add The Acid:
- Once at temperature, begin adding your lemon juice or vinegar one tablespoon at a time while gently stirring. Watch closely for the magical moment when the milk separates into white curds floating in yellowish whey. This typically happens after 5 to 6 tablespoons but can vary. Stop adding acid once you see clear separation.
- Rest And Separate:
- Allow the pot to sit undisturbed for at least 5 minutes and up to 20 minutes to complete the separation process. This resting period helps the curds fully develop and makes collection easier. You will notice the curds becoming more defined during this time.
- Collect And Drain:
- Using a slotted spoon or wire skimmer, gently transfer the curds to your prepared colander. Cover the top with plastic wrap to protect the cheese. Allow to drain for about 20 minutes if planning to press the cheese, or about an hour for fresh, crumbly curds.
- Season And Finish:
- Gently fold salt into your cheese curds to taste. For pressed queso fresco, gather the curds into the center of the cloth and shape into a hockey puck. Tie the cloth closed around the cheese, return to the colander, and place a heavy can or pan on top to press for about 90 minutes.
The moment I watch whole milk transform into distinct curds and whey still feels like kitchen magic even after making this recipe dozens of times. My grandmother used to say cheese making connects us to thousands of years of culinary tradition, and I feel that connection every time I make this recipe.
Storage Solutions
Homemade queso fresco will keep in the refrigerator for about 1 week when properly stored. Wrap the cheese in parchment paper or wax paper first, then place in an airtight container. This allows the cheese to breathe slightly while protecting it from absorbing other flavors in your refrigerator. The cheese is at its peak flavor and texture within the first 3 days.
Perfect Pairings
Queso fresco shines when crumbled over dishes that benefit from its cool, fresh contrast. Sprinkle liberally over spicy enchiladas, tostadas, or chile rellenos. The mild flavor balances heat beautifully. For breakfast, try it crumbled over huevos rancheros or folded into scrambled eggs just before serving. The cheese also makes an excellent addition to salads, providing creamy texture without overwhelming other ingredients.
Troubleshooting Tips
If your milk fails to separate properly, the most common culprit is ultra-pasteurized milk. The high heat used in ultra-pasteurization denatures proteins needed for curdling. Another possibility is that your acid amount was insufficient. In either case, you can try heating the milk again and adding 1 to 2 more tablespoons of acid. Temperature matters too. If your thermometer is inaccurate, you might not be reaching the necessary heat for separation.
Flavor Variations
While traditional queso fresco is simply salted, you can create delicious variations by incorporating herbs or spices into the curds before pressing. Try finely chopped cilantro and lime zest for a version perfect for Mexican dishes, or add cracked black pepper and dried oregano for an Italian-inspired fresh cheese. For a subtle heat, mix in a small amount of finely minced jalapeño with the seeds removed.
Frequently Asked Questions
- → What kind of milk is best for queso fresco?
Whole milk that is not ultra-pasteurized works best as it yields creamier curds suitable for making queso fresco.
- → Can I use vinegar instead of lemon juice?
Yes, white vinegar works perfectly as an acidic agent and produces the same curdling effect as lemon juice.
- → How long does queso fresco last?
When stored in an airtight container in the refrigerator, queso fresco typically lasts up to a week.
- → Why do the curds separate from the whey?
The acid in lemon juice or vinegar reacts with the proteins in milk, causing the curds to coagulate and separate from the liquid whey.
- → What equipment do I need?
You’ll need a pot, thermometer, strainer, cheesecloth (or a clean towel), and containers for draining and pressing the cheese.
- → Can I make pressed queso fresco?
Yes, by wrapping the curds in a cloth and applying weight, you can create a firmer, pressed cheese texture.
